


搜索到
109
篇与
的结果
-
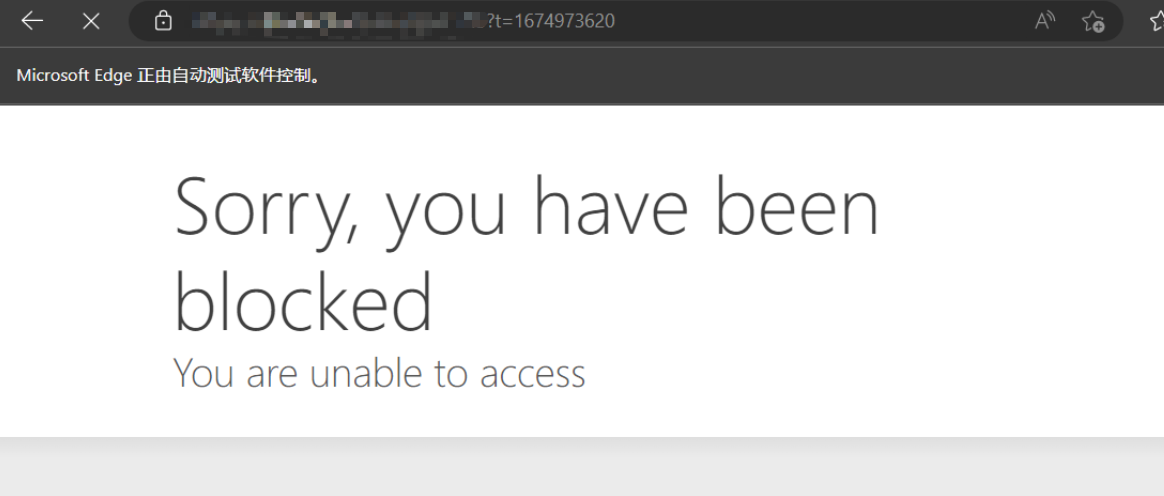
 selenium爬虫如何防止被浏览器特征抓取反爬 前言爬网站的时候遇到了cf拦截,根据百度到的尝试添加参数还是无法跳过service = Service('msedgedriver.exe') options = Options() # 开启开发者模式 options.add_experimental_option('excludeSwitches', ['enable-automation']) # 禁用Blink运行时功能 options.add_argument('--disable-blink-features=AutomationControlled') driver = webdriver.Edge(service=service)undetected-chromedriverOptimized Selenium Chromedriver patch which does not trigger anti-bot services like Distill Network / Imperva / DataDome / Botprotect.io Automatically downloads the driver binary and patches it.Tested until current chrome beta versionsWorks also on Brave Browser and many other Chromium based browsers, some tweakingPython 3.6++**我主要使用的Edge,介绍说会自动下载Chrome,并没有体验到,于是自己安装了Chrome浏览器代码跟之前selenium的相差不大,成功解决了问题,再没出现过Cf拦截from pyquery import PyQuery as pq import re import time from undetected_chromedriver import ChromeOptions import undetected_chromedriver as uc options = ChromeOptions() options.add_argument('--headless') options.add_argument('--disable-gpu') driver = uc.Chrome(options=options) driver.get('http://...') html_source = driver.page_source doc = pq(html_source) titles = doc.find('tag')引用1.ultrafunkamsterdam/undetected-chromedriver:https://github.com/ultrafunkamsterdam/undetected-chromedriver2.Chrome Headless Detection (Round II):https://intoli.com/blog/not-possible-to-block-chrome-headless/chrome-headless-test.html3.selenium爬虫如何防止被浏览器特征抓取反爬,undetected_chromedriver他来了。:https://blog.csdn.net/wywinstonwy/article/details/118479162
 -
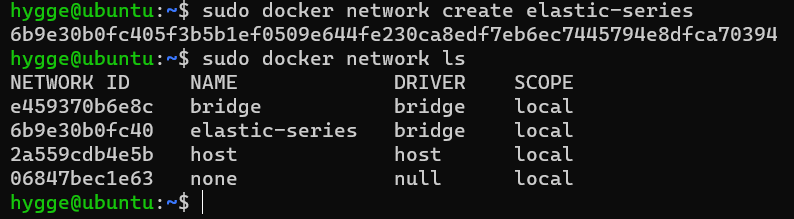
Laravel+Scout+Elasticsearch实现中文分词搜索功能 一、准备工作1.配置机器ssh连接sudo apt update sudo apt install openssh-server # ssh二、Docker安装ElasticSearch2.1 安装说明在平时工作的时候,开发环境大多数会安装单机ElasticSearch,但生产环境基本会安装ElasticSearch集群版。不过中文搜索,会实现分词器集成,可以采用IK分词器。ElasticSearch采用Kibana实现数据可视化分析也是当前主流,所以我们除了安装ElasticSearch和IK分词器外,还需要安装Kibana。安装实践:1:ElasticSearch单机安装 2:IK分词器安装 3:Kibana安装 2.2 Docker安装ElasticSearch当前ElasticSearch已经到了8.0,新版本都有很多新特性,性能和功能都有大幅提升,我们建议使用较高版本,这里将采用8.6.0版本。 2.2.1 网络创建高版本安装Kibana的时候需要和ElasticSearch在同一网段内,所以采用docker安装首先要确认网段,为了方便操作,我们直接创建一个网络,创建脚本如下:sudo docker network create elastic-series2.2.2 ElasticSearch安装安装ElasticSearch脚本如下:sudo docker run -d \ --name elasticsearch \ -e "ES_JAVA_OPTS=-Xms512m -Xmx512m" \ -e "discovery.type=single-node" \ -v es-data:/usr/share/elasticsearch/data \ -v es-plugins:/usr/share/elasticsearch/plugins \ --privileged \ --network elastic-series \ -p 9200:9200 \ -p 9300:9300 \ elasticsearch:8.6.0命令说明:-e "cluster.name=es-docker-cluster":设置集群名称-e "http.host=0.0.0.0":监听的地址,可以外网访问-e "ES_JAVA_OPTS=-Xms512m -Xmx512m":内存大小-e "discovery.type=single-node":非集群模式-v es-data:/usr/share/elasticsearch/data:挂载逻辑卷,绑定elasticsearch的数据目录-v es-logs:/usr/share/elasticsearch/logs:挂载逻辑卷,绑定elasticsearch的日志目录-v es-plugins:/usr/share/elasticsearch/plugins:挂载逻辑卷,绑定elasticsearch的插件目录--privileged:授予逻辑卷访问权--network elastic-series :加入一个名为elastic-series的网络中-p 9200:9200:端口映射配置Docker安装ElasticSearch下载可能会比较慢,需要耐心等待,效果如下:安装完成后,在浏览器中输入:http://192.168.211.128:9200/即可看到elasticsearch的响应结果:You can Generate a new password using/usr/share/elasticsearch/elasticsearch-setup-passwords auto/interactiveinteractive is where you will have to enter password for all user.auto will just print passwords on the shell.elseYou can turn off x-pack security in elasticsearch.yml2.2.2.1 关闭安全验证1.进入容器内部sudo docker exec -it -u root <container> bash2.安装Vim,为编辑文件做准备apt-get update apt-get install vim3.编辑config/elasticsearch.yml# 追加 xpack.security.enabled: false4.退出并重启容器exit sudo docker restart <container>刷新页面,得到正常响应 3 安装Kibana我们可以基于Http请求操作ElasticSearch,但基于Http操作比较麻烦,我们可以采用Kibana实现可视化操作。2.2.2.2 设置密码详见引用第九条三、Docker安装Kibana3.1 Kibana介绍Kibana 是一个免费且开放的用户界面,能够让您对 Elasticsearch 数据进行可视化,并让您在 Elastic Stack 中进行导航。您可以进行各种操作,从跟踪查询负载,到理解请求如何流经您的整个应用,都能轻松完成。Kibana 让您能够自由地选择如何呈现自己的数据。不过借助 Kibana 的交互式可视化,您可以先从一个问题出发,看看能够从中发现些什么。 可视化界面如下: 3.2 Kibana安装使用Docker安装Kibana非常简单,只需要执行如下命令即可,但是执行命令需要注意Kibana操作的ElasticSearch地址,因为Kibana是需要连接ElasticSearch进行操作的,命令如下:sudo docker run -d \ --name kibana \ -e ELASTICSEARCH_HOSTS=http://192.168.211.128:9200 \ --network elastic-series \ -p 5601:5601 \ kibana:8.6.0命令说明:--network elastic-series :加入一个名为elastic-series的网络中,与elasticsearch在同一个网络中-e ELASTICSEARCH_HOSTS=http://192.168.211.128:9200":设置elasticsearch的地址,因为kibana已经与elasticsearch在一个网络,因此可以用容器名直接访问elasticsearch,也可以写IP地址实现访问。-p 5601:5601:端口映射配置安装的时候如果没有镜像,会下载镜像,效果如下:kibana安装会比较耗时间,也需要耐心等待下载安装完成,如果想实时知道服务安装运行的状态,可以通过查看日志实现,查看日志如下:docker logs -f kibana日志中如果出现了http://0.0.0.0:5601即可访问Kibana后台服务,日志如下:访问http://192.168.211.128:5601效果如下:可以点击Add integrations,添加示例数据,如下图,随意选一个即可,不选其实也是可以的。 3.3 Kibana中文配置我们发现Kibana是英文面板,看起来不是很方便,但Kibana是支持中文配置,所以我们可以把Kibana配置成中文版,便于我们操作。切换中文操作如下:#进入容器 docker exec -it kibana /bin/bash #进入配置文件目录 cd /usr/share/kibana/config #编辑文件kibana.yml vi kibana.yml #在最后一行添加如下配置 i18n.locale: zh-CN #保存退出 exit #并重启容器 docker restart kibana 等待Kibana容器启动,再次访问http://192.168.211.128:5601/效果如下: 四、IK分词器安装我们打开Kibana,点击开发工具,操作如下:输入如下操作,用于查询分词:上图测试代码如下:GET _analyze { "analyzer": "standard", "text": "过去无可挽回,未来可以改变" }表示使用standard对过去无可挽回,未来可以改变进行分词。分词:提取一句话或者一篇文章中的词语。我们在使用ElasticSearch的时候,默认用standard分词器,但standard分词器使用的是按空格分词,这种分词操作方法不符合中文分词标准,我们需要额外安装中文分词器。 4.1 IK分词器介绍IK Analyzer是一个开源的,基于java语言开发的轻量级的中文分词工具包。从2006年12月推出1.0版开始, IKAnalyzer已经推出了多个大版本。最初,它是以开源项目Luence为应用主体的,结合词典分词和文法分析算法的中文分词组件。IK Analyzer则发展为面向Java的公用分词组件,独立于Lucene项目,同时提供了对Lucene的默认优化实现。 ElasticSearch内核其实就是基于Lucene,所以我们可以直接在ElasticSearch中集成IK分词器,IK分词器集成ElasticSearch下载地址:https://github.com/medcl/elasticsearch-analysis-ik/releases 4.2 IK分词器配置下载安装包elasticsearch-analysis-ik-8.6.0.zip后,并解压,目录如下:我们只需要将上面ik拷贝到ElasticSearch的plugins目录中即可,但由于当前服务采用的是docker安装,所以需要将文件拷贝到docker容器的plugins目录才行。操作如下:#将ik文件夹拷贝到elasticsearch容器中 docker cp ik elasticsearch:/usr/share/elasticsearch/plugins #重启容器 docker restart elasticsearch操作效果如下: 4.3 分词测试IK分词器包含两种模式:ik_smart:最少切分ik_max_word:最细切分 前面使用默认的standard分词器,对中文分词非常难用,安装IK分词器后,我们可以使用IK分词器测试,测试代码如下:GET /_analyze { "analyzer": "ik_max_word", "text": "过去无可挽回,未来可以改变" }测试效果如下:我们可以发现对中文的分词效果是比较不错的,但也存在一些不足,比如无可挽回我们希望它是一个词,而可挽回我们希望它不被识别一个词,又该如何实现呢?自定义词典参考引用中的第2个链接五、Laravel集成使用的第三方包matchish/laravel-scout-elasticsearch:https://github.com/matchish/laravel-scout-elasticsearch名称版本php^8.0.2laravel/framework^9.19matchish/laravel-scout-elasticsearch^6.05.1 介绍Laravel Scout 为 Eloquent 模型 的全文搜索提供了一个简单的基于驱动程序的解决方案,通过使用模型观察者,Scout 将自动同步 Eloquent 记录的搜索索引。目前,Scout 附带 Algolia、MeiliSearch 和 MySQL / PostgreSQL (database) 驱动程序。此外,Scout 包括一个「collection」驱动程序,该驱动程序专为本地开发使用而设计,不需要任何外部依赖项或第三方服务。此外,编写自定义驱动程序很简单,你可以使用自己的搜索实现自由扩展 Scout。由于没有自带Elasticsearch的驱动,所以需要第三方包5.1 安装包和配置1.引入包composer require matchish/laravel-scout-elasticsearch2.env设置环境变量SCOUT_DRIVER=Matchish\ScoutElasticSearch\Engines\ElasticSearchEngine ELASTICSEARCH_HOST=192.168.211.128:92003.config/app.php中配置provider'providers' => [ // Other Service Providers \Matchish\ScoutElasticSearch\ElasticSearchServiceProvider::class ],4.发布配置文件php artisan vendor:publish --tag config会新增config/elasticsearch.php文件5.2 更新模型1.更新模型<?php namespace App\Models; use App\Trait\DefaultDatetimeFormat; use Illuminate\Database\Eloquent\Model; use Laravel\Scout\Searchable; class Video extends Model { use DefaultDatetimeFormat, Searchable; protected $fillable = ['img', 'title', 'innerVideoHref', 'innerHref', 'viewNumber', 'likeNumber', 'helpInfo', 'type']; /** * Get the indexable data array for the model. * 我想只根据title来分词检索 * @return array */ public function toSearchableArray() { return $this->only(['title']); } /** * Get the index name for the model. * 指定索引的名称 * @return string */ public function searchableAs() { return 'videos_index'; } /** * 指定 搜索索引中存储的唯一ID * @return mixed */ public function getScoutKey() { return $this->id; } /** * 指定 搜索索引中存储的唯一ID的键名 * @return string */ public function getScoutKeyName() { return 'id'; } }2.修改config/elasticsearch.php<?php return [ 'host' => env('ELASTICSEARCH_HOST','192.168.211.128:9200'), 'indices' => [ 'mappings' => [ 'default' => [ 'properties' => [ 'id' => [ 'type' => 'keyword', ], ], ], // 与上一步的索引名称对应 'videos_index' => [ 'properties' => [ 'title' => [ 'type' => 'text', 'analyzer' => 'ik_max_word', 'search_analyzer' => 'ik_max_word', ], ], ], ], 'settings' => [ 'default' => [ 'number_of_shards' => 1, 'number_of_replicas' => 0, ], ], ], ];3.索引的批量导入php artisan scout:import5.3 使用场景:根据当前播放的视频名称,检索出来十个相关的视频作为推荐public function play($type, $id) { // 直接根据类型和视频ID进行查询 $video = Video::where('type', $type)->where('id', $id)->first(); $videoSeries = Video::search($video->title)->take(10)->get(); dd($videoSeries); }六、遇到的问题6.1 Kibana 服务器尚未准备就绪。在服务器上部署时,访问Kibana出现了查看日志docker logs kibana [2023-01-18T02:05:30.467+00:00][ERROR][elasticsearch-service] Unable to retrieve version information from Elasticsearch nodes. connect ECONNREFUSED 127.0.0.1:9200原因是创建容器时填写的sudo docker run -d \ --name kibana \ -e ELASTICSEARCH_HOSTS=http://127.0.0.1:9200 \ -p 5601:5601 \ kibana:8.6.0这里不可以使用127.0.0.1需要使用私有IP重新创建后即可正常访问6.2 无法访问在虚拟机上部署时按照步骤并开放端口是可以访问9200和5601端口在服务器上按照 创建网络 -> 创建elasticsearch、kibana容器设置网络 的步骤走下来 始终访问不了对应的端口不清楚原因,于是去掉了创建容器时的网络配置引用1.如何在 Ubuntu 20.04 启用 SSH :https://zhuanlan.zhihu.com/p/1457637892.你必须会的Docker安装ElasticSearch教程:https://juejin.cn/post/70741156903402864723.Install Kibana with Docker:https://www.elastic.co/guide/en/kibana/current/docker.html4.Elasticsearch_Installation_asking for username and password:https://stackoverflow.com/questions/71269878/elasticsearch-installation-asking-for-username-and-password5.Releases · medcl/elasticsearch-analysis-ik (github.com):https://github.com/medcl/elasticsearch-analysis-ik/releases6.matchish/laravel-scout-elasticsearch: Search among multiple models with ElasticSearch and Laravel Scout (github.com):https://github.com/matchish/laravel-scout-elasticsearch7.只需五步 集成新版 Elasticsearch7.9 中文搜索 到你的 Laravel7 项目:https://juejin.cn/post/68651885751143301268.php Laravel 使用elasticsearch+ik中文分词器搭建搜索引擎:https://blog.csdn.net/weixin_42701376/article/details/126782529?spm=1001.2101.3001.6650.2&utm_medium=distribute.pc_relevant.none-task-blog-2~default~BlogCommendFromBaidu~Rate-2-126782529-blog-109466440.pc_relevant_multi_platform_whitelistv4&depth_1-utm_source=distribute.pc_relevant.none-task-blog-2~default~BlogCommendFromBaidu~Rate-2-126782529-blog-109466440.pc_relevant_multi_platform_whitelistv4&utm_relevant_index=39.docker中设置elasticsearch、kibana用户名密码、修改密码:https://blog.csdn.net/IT_road_qxc/article/details/121858843
-
php-simple-html-dom-parser for PHP7.3 + If you use php 7.3 and higher, then use my edits. Otherwise, you will get errors due to migration to PCRE2 in new versions of PHP.For example: Warning: preg_match_all (): Compilation failed: invalid range in character class at offset 4fixapp\Utils\HtmlDomParser.php<?php namespace App\Utils; require 'simplehtmldom_1_5' . DIRECTORY_SEPARATOR . 'simple_html_dom.php'; class HtmlDomParser { static public function file_get_html($file) { return file_get_html($file); } static public function str_get_html($str) { return str_get_html($str); } }app\Utils\simplehtmldom_1_5\simple_html_dom.php<?php /** * Website: http://sourceforge.net/projects/simplehtmldom/ * Acknowledge: Jose Solorzano (https://sourceforge.net/projects/php-html/) * Contributions by: * Yousuke Kumakura (Attribute filters) * Vadim Voituk (Negative indexes supports of "find" method) * Antcs (Constructor with automatically load contents either text or file/url) * * all affected sections have comments starting with "PaperG" * * Paperg - Added case insensitive testing of the value of the selector. * Paperg - Added tag_start for the starting index of tags - NOTE: This works but not accurately. * This tag_start gets counted AFTER \r\n have been crushed out, and after the remove_noice calls so it will not reflect the REAL position of the tag in the source, * it will almost always be smaller by some amount. * We use this to determine how far into the file the tag in question is. This "percentage will never be accurate as the $dom->size is the "real" number of bytes the dom was created from. * but for most purposes, it's a really good estimation. * Paperg - Added the forceTagsClosed to the dom constructor. Forcing tags closed is great for malformed html, but it CAN lead to parsing errors. * Allow the user to tell us how much they trust the html. * Paperg add the text and plaintext to the selectors for the find syntax. plaintext implies text in the innertext of a node. text implies that the tag is a text node. * This allows for us to find tags based on the text they contain. * Create find_ancestor_tag to see if a tag is - at any level - inside of another specific tag. * Paperg: added parse_charset so that we know about the character set of the source document. * NOTE: If the user's system has a routine called get_last_retrieve_url_contents_content_type availalbe, we will assume it's returning the content-type header from the * last transfer or curl_exec, and we will parse that and use it in preference to any other method of charset detection. * * Licensed under The MIT License * Redistributions of files must retain the above copyright notice. * * @author S.C. Chen <me578022@gmail.com> * @author John Schlick * @author Rus Carroll * @version 1.11 ($Rev: 184 $) * @package PlaceLocalInclude * @subpackage simple_html_dom */ /** * All of the Defines for the classes below. * @author S.C. Chen <me578022@gmail.com> */ define('HDOM_TYPE_ELEMENT', 1); define('HDOM_TYPE_COMMENT', 2); define('HDOM_TYPE_TEXT', 3); define('HDOM_TYPE_ENDTAG', 4); define('HDOM_TYPE_ROOT', 5); define('HDOM_TYPE_UNKNOWN', 6); define('HDOM_QUOTE_DOUBLE', 0); define('HDOM_QUOTE_SINGLE', 1); define('HDOM_QUOTE_NO', 3); define('HDOM_INFO_BEGIN', 0); define('HDOM_INFO_END', 1); define('HDOM_INFO_QUOTE', 2); define('HDOM_INFO_SPACE', 3); define('HDOM_INFO_TEXT', 4); define('HDOM_INFO_INNER', 5); define('HDOM_INFO_OUTER', 6); define('HDOM_INFO_ENDSPACE', 7); define('DEFAULT_TARGET_CHARSET', 'UTF-8'); define('DEFAULT_BR_TEXT', "\r\n"); // helper functions // ----------------------------------------------------------------------------- // get html dom from file // $maxlen is defined in the code as PHP_STREAM_COPY_ALL which is defined as -1. function file_get_html($url, $use_include_path = false, $context = null, $offset = -1, $maxLen = -1, $lowercase = true, $forceTagsClosed = true, $target_charset = DEFAULT_TARGET_CHARSET, $stripRN = true, $defaultBRText = DEFAULT_BR_TEXT) { // We DO force the tags to be terminated. $dom = new simple_html_dom(null, $lowercase, $forceTagsClosed, $target_charset, $defaultBRText); // For sourceforge users: uncomment the next line and comment the retreive_url_contents line 2 lines down if it is not already done. $contents = file_get_contents($url, $use_include_path, $context, $offset); // Paperg - use our own mechanism for getting the contents as we want to control the timeout. // $contents = retrieve_url_contents($url); if (empty($contents)) { return false; } // The second parameter can force the selectors to all be lowercase. $dom->load($contents, $lowercase, $stripRN); return $dom; } // get html dom from string function str_get_html($str, $lowercase = true, $forceTagsClosed = true, $target_charset = DEFAULT_TARGET_CHARSET, $stripRN = true, $defaultBRText = DEFAULT_BR_TEXT) { $dom = new simple_html_dom(null, $lowercase, $forceTagsClosed, $target_charset, $defaultBRText); if (empty($str)) { $dom->clear(); return false; } $dom->load($str, $lowercase, $stripRN); return $dom; } // dump html dom tree function dump_html_tree($node, $show_attr = true, $deep = 0) { $node->dump($node); } /** * simple html dom node * PaperG - added ability for "find" routine to lowercase the value of the selector. * PaperG - added $tag_start to track the start position of the tag in the total byte index * * @package PlaceLocalInclude */ class simple_html_dom_node { public $nodetype = HDOM_TYPE_TEXT; public $tag = 'text'; public $attr = array(); public $children = array(); public $nodes = array(); public $parent = null; public $_ = array(); public $tag_start = 0; private $dom = null; function __construct($dom) { $this->dom = $dom; $dom->nodes[] = $this; } function __destruct() { $this->clear(); } function __toString() { return $this->outertext(); } // clean up memory due to php5 circular references memory leak... function clear() { $this->dom = null; $this->nodes = null; $this->parent = null; $this->children = null; } // dump node's tree function dump($show_attr = true, $deep = 0) { $lead = str_repeat(' ', $deep); echo $lead . $this->tag; if ($show_attr && count($this->attr) > 0) { echo '('; foreach ($this->attr as $k => $v) echo "[$k]=>\"" . $this->$k . '", '; echo ')'; } echo "\n"; foreach ($this->nodes as $c) $c->dump($show_attr, $deep + 1); } // Debugging function to dump a single dom node with a bunch of information about it. function dump_node() { echo $this->tag; if (count($this->attr) > 0) { echo '('; foreach ($this->attr as $k => $v) { echo "[$k]=>\"" . $this->$k . '", '; } echo ')'; } if (count($this->attr) > 0) { echo ' $_ ('; foreach ($this->_ as $k => $v) { if (is_array($v)) { echo "[$k]=>("; foreach ($v as $k2 => $v2) { echo "[$k2]=>\"" . $v2 . '", '; } echo ")"; } else { echo "[$k]=>\"" . $v . '", '; } } echo ")"; } if (isset($this->text)) { echo " text: (" . $this->text . ")"; } echo " children: " . count($this->children); echo " nodes: " . count($this->nodes); echo " tag_start: " . $this->tag_start; echo "\n"; } // returns the parent of node function parent() { return $this->parent; } // returns children of node function children($idx = -1) { if ($idx === -1) return $this->children; if (isset($this->children[$idx])) return $this->children[$idx]; return null; } // returns the first child of node function first_child() { if (count($this->children) > 0) return $this->children[0]; return null; } // returns the last child of node function last_child() { if (($count = count($this->children)) > 0) return $this->children[$count - 1]; return null; } // returns the next sibling of node function next_sibling() { if ($this->parent === null) return null; $idx = 0; $count = count($this->parent->children); while ($idx < $count && $this !== $this->parent->children[$idx]) ++$idx; if (++$idx >= $count) return null; return $this->parent->children[$idx]; } // returns the previous sibling of node function prev_sibling() { if ($this->parent === null) return null; $idx = 0; $count = count($this->parent->children); while ($idx < $count && $this !== $this->parent->children[$idx]) ++$idx; if (--$idx < 0) return null; return $this->parent->children[$idx]; } // function to locate a specific ancestor tag in the path to the root. function find_ancestor_tag($tag) { global $debugObject; if (is_object($debugObject)) { $debugObject->debugLogEntry(1); } // Start by including ourselves in the comparison. $returnDom = $this; while (!is_null($returnDom)) { if (is_object($debugObject)) { $debugObject->debugLog(2, "Current tag is: " . $returnDom->tag); } if ($returnDom->tag == $tag) { break; } $returnDom = $returnDom->parent; } return $returnDom; } // get dom node's inner html function innertext() { if (isset($this->_[HDOM_INFO_INNER])) return $this->_[HDOM_INFO_INNER]; if (isset($this->_[HDOM_INFO_TEXT])) return $this->dom->restore_noise($this->_[HDOM_INFO_TEXT]); $ret = ''; foreach ($this->nodes as $n) $ret .= $n->outertext(); return $ret; } // get dom node's outer text (with tag) function outertext() { global $debugObject; if (is_object($debugObject)) { $text = ''; if ($this->tag == 'text') { if (!empty($this->text)) { $text = " with text: " . $this->text; } } $debugObject->debugLog(1, 'Innertext of tag: ' . $this->tag . $text); } if ($this->tag === 'root') return $this->innertext(); // trigger callback if ($this->dom && $this->dom->callback !== null) { call_user_func_array($this->dom->callback, array($this)); } if (isset($this->_[HDOM_INFO_OUTER])) return $this->_[HDOM_INFO_OUTER]; if (isset($this->_[HDOM_INFO_TEXT])) return $this->dom->restore_noise($this->_[HDOM_INFO_TEXT]); // render begin tag if ($this->dom && $this->dom->nodes[$this->_[HDOM_INFO_BEGIN]]) { $ret = $this->dom->nodes[$this->_[HDOM_INFO_BEGIN]]->makeup(); } else { $ret = ""; } // render inner text if (isset($this->_[HDOM_INFO_INNER])) { // If it's a br tag... don't return the HDOM_INNER_INFO that we may or may not have added. if ($this->tag != "br") { $ret .= $this->_[HDOM_INFO_INNER]; } } else { if ($this->nodes) { foreach ($this->nodes as $n) { $ret .= $this->convert_text($n->outertext()); } } } // render end tag if (isset($this->_[HDOM_INFO_END]) && $this->_[HDOM_INFO_END] != 0) $ret .= '</' . $this->tag . '>'; return $ret; } // get dom node's plain text function text() { if (isset($this->_[HDOM_INFO_INNER])) return $this->_[HDOM_INFO_INNER]; switch ($this->nodetype) { case HDOM_TYPE_TEXT: return $this->dom->restore_noise($this->_[HDOM_INFO_TEXT]); case HDOM_TYPE_COMMENT: return ''; case HDOM_TYPE_UNKNOWN: return ''; } if (strcasecmp($this->tag, 'script') === 0) return ''; if (strcasecmp($this->tag, 'style') === 0) return ''; $ret = ''; // In rare cases, (always node type 1 or HDOM_TYPE_ELEMENT - observed for some span tags, and some p tags) $this->nodes is set to NULL. // NOTE: This indicates that there is a problem where it's set to NULL without a clear happening. // WHY is this happening? if (!is_null($this->nodes)) { foreach ($this->nodes as $n) { $ret .= $this->convert_text($n->text()); } } return $ret; } function xmltext() { $ret = $this->innertext(); $ret = str_ireplace('<![CDATA[', '', $ret); $ret = str_replace(']]>', '', $ret); return $ret; } // build node's text with tag function makeup() { // text, comment, unknown if (isset($this->_[HDOM_INFO_TEXT])) return $this->dom->restore_noise($this->_[HDOM_INFO_TEXT]); $ret = '<' . $this->tag; $i = -1; foreach ($this->attr as $key => $val) { ++$i; // skip removed attribute if ($val === null || $val === false) continue; $ret .= $this->_[HDOM_INFO_SPACE][$i][0]; //no value attr: nowrap, checked selected... if ($val === true) $ret .= $key; else { switch ($this->_[HDOM_INFO_QUOTE][$i]) { case HDOM_QUOTE_DOUBLE: $quote = '"'; break; case HDOM_QUOTE_SINGLE: $quote = '\''; break; default: $quote = ''; } $ret .= $key . $this->_[HDOM_INFO_SPACE][$i][1] . '=' . $this->_[HDOM_INFO_SPACE][$i][2] . $quote . $val . $quote; } } $ret = $this->dom->restore_noise($ret); return $ret . $this->_[HDOM_INFO_ENDSPACE] . '>'; } // find elements by css selector //PaperG - added ability for find to lowercase the value of the selector. function find($selector, $idx = null, $lowercase = false) { $selectors = $this->parse_selector($selector); if (($count = count($selectors)) === 0) return array(); $found_keys = array(); // find each selector for ($c = 0; $c < $count; ++$c) { // The change on the below line was documented on the sourceforge code tracker id 2788009 // used to be: if (($levle=count($selectors[0]))===0) return array(); if (($levle = count($selectors[$c])) === 0) return array(); if (!isset($this->_[HDOM_INFO_BEGIN])) return array(); $head = array($this->_[HDOM_INFO_BEGIN] => 1); // handle descendant selectors, no recursive! for ($l = 0; $l < $levle; ++$l) { $ret = array(); foreach ($head as $k => $v) { $n = ($k === -1) ? $this->dom->root : $this->dom->nodes[$k]; //PaperG - Pass this optional parameter on to the seek function. $n->seek($selectors[$c][$l], $ret, $lowercase); } $head = $ret; } foreach ($head as $k => $v) { if (!isset($found_keys[$k])) $found_keys[$k] = 1; } } // sort keys ksort($found_keys); $found = array(); foreach ($found_keys as $k => $v) $found[] = $this->dom->nodes[$k]; // return nth-element or array if (is_null($idx)) return $found; else if ($idx < 0) $idx = count($found) + $idx; return (isset($found[$idx])) ? $found[$idx] : null; } // seek for given conditions // PaperG - added parameter to allow for case insensitive testing of the value of a selector. protected function seek($selector, &$ret, $lowercase = false) { global $debugObject; if (is_object($debugObject)) { $debugObject->debugLogEntry(1); } list($tag, $key, $val, $exp, $no_key) = $selector; // xpath index if ($tag && $key && is_numeric($key)) { $count = 0; foreach ($this->children as $c) { if ($tag === '*' || $tag === $c->tag) { if (++$count == $key) { $ret[$c->_[HDOM_INFO_BEGIN]] = 1; return; } } } return; } $end = (!empty($this->_[HDOM_INFO_END])) ? $this->_[HDOM_INFO_END] : 0; if ($end == 0) { $parent = $this->parent; while (!isset($parent->_[HDOM_INFO_END]) && $parent !== null) { $end -= 1; $parent = $parent->parent; } $end += $parent->_[HDOM_INFO_END]; } for ($i = $this->_[HDOM_INFO_BEGIN] + 1; $i < $end; ++$i) { $node = $this->dom->nodes[$i]; $pass = true; if ($tag === '*' && !$key) { if (in_array($node, $this->children, true)) $ret[$i] = 1; continue; } // compare tag if ($tag && $tag != $node->tag && $tag !== '*') { $pass = false; } // compare key if ($pass && $key) { if ($no_key) { if (isset($node->attr[$key])) $pass = false; } else { if (($key != "plaintext") && !isset($node->attr[$key])) $pass = false; } } // compare value if ($pass && $key && $val && $val !== '*') { // If they have told us that this is a "plaintext" search then we want the plaintext of the node - right? if ($key == "plaintext") { // $node->plaintext actually returns $node->text(); $nodeKeyValue = $node->text(); } else { // this is a normal search, we want the value of that attribute of the tag. $nodeKeyValue = $node->attr[$key]; } if (is_object($debugObject)) { $debugObject->debugLog(2, "testing node: " . $node->tag . " for attribute: " . $key . $exp . $val . " where nodes value is: " . $nodeKeyValue); } //PaperG - If lowercase is set, do a case insensitive test of the value of the selector. if ($lowercase) { $check = $this->match($exp, strtolower($val), strtolower($nodeKeyValue)); } else { $check = $this->match($exp, $val, $nodeKeyValue); } if (is_object($debugObject)) { $debugObject->debugLog(2, "after match: " . ($check ? "true" : "false")); } // handle multiple class if (!$check && strcasecmp($key, 'class') === 0) { foreach (explode(' ', $node->attr[$key]) as $k) { // Without this, there were cases where leading, trailing, or double spaces lead to our comparing blanks - bad form. if (!empty($k)) { if ($lowercase) { $check = $this->match($exp, strtolower($val), strtolower($k)); } else { $check = $this->match($exp, $val, $k); } if ($check) break; } } } if (!$check) $pass = false; } if ($pass) $ret[$i] = 1; unset($node); } // It's passed by reference so this is actually what this function returns. if (is_object($debugObject)) { $debugObject->debugLog(1, "EXIT - ret: ", $ret); } } protected function match($exp, $pattern, $value) { global $debugObject; if (is_object($debugObject)) { $debugObject->debugLogEntry(1); } switch ($exp) { case '=': return ($value === $pattern); case '!=': return ($value !== $pattern); case '^=': return preg_match("/^" . preg_quote($pattern, '/') . "/", $value); case '$=': return preg_match("/" . preg_quote($pattern, '/') . "$/", $value); case '*=': if ($pattern[0] == '/') { return preg_match($pattern, $value); } return preg_match("/" . $pattern . "/i", $value); } return false; } protected function parse_selector($selector_string) { global $debugObject; if (is_object($debugObject)) { $debugObject->debugLogEntry(1); } // pattern of CSS selectors, modified from mootools // Paperg: Add the colon to the attrbute, so that it properly finds <tag attr:ibute="something" > like google does. // Note: if you try to look at this attribute, yo MUST use getAttribute since $dom->x:y will fail the php syntax check. // Notice the \[ starting the attbute? and the @? following? This implies that an attribute can begin with an @ sign that is not captured. // This implies that an html attribute specifier may start with an @ sign that is NOT captured by the expression. // farther study is required to determine of this should be documented or removed. // $pattern = "/([\w-:\*]*)(?:\#([\w-]+)|\.([\w-]+))?(?:\[@?(!?[\w-]+)(?:([!*^$]?=)[\"']?(.*?)[\"']?)?\])?([\/, ]+)/is"; $pattern = "/([\w\-:\*]*)(?:\#([\w\-]+)|\.([\w\-]+))?(?:\[@?(!?[\w\-:]+)(?:([!*^$]?=)[\"']?(.*?)[\"']?)?\])?([\/, ]+)/is"; preg_match_all($pattern, trim($selector_string) . ' simple_html_dom.php', $matches, PREG_SET_ORDER); if (is_object($debugObject)) { $debugObject->debugLog(2, "Matches Array: ", $matches); } $selectors = array(); $result = array(); //print_r($matches); foreach ($matches as $m) { $m[0] = trim($m[0]); if ($m[0] === '' || $m[0] === '/' || $m[0] === '//') continue; // for browser generated xpath if ($m[1] === 'tbody') continue; list($tag, $key, $val, $exp, $no_key) = array($m[1], null, null, '=', false); if (!empty($m[2])) { $key = 'id'; $val = $m[2]; } if (!empty($m[3])) { $key = 'class'; $val = $m[3]; } if (!empty($m[4])) { $key = $m[4]; } if (!empty($m[5])) { $exp = $m[5]; } if (!empty($m[6])) { $val = $m[6]; } // convert to lowercase if ($this->dom->lowercase) { $tag = strtolower($tag); $key = strtolower($key); } //elements that do NOT have the specified attribute if (isset($key[0]) && $key[0] === '!') { $key = substr($key, 1); $no_key = true; } $result[] = array($tag, $key, $val, $exp, $no_key); if (trim($m[7]) === ',') { $selectors[] = $result; $result = array(); } } if (count($result) > 0) $selectors[] = $result; return $selectors; } function __get($name) { if (isset($this->attr[$name])) { return $this->convert_text($this->attr[$name]); } switch ($name) { case 'outertext': return $this->outertext(); case 'innertext': return $this->innertext(); case 'plaintext': return $this->text(); case 'xmltext': return $this->xmltext(); default: return array_key_exists($name, $this->attr); } } function __set($name, $value) { switch ($name) { case 'outertext': return $this->_[HDOM_INFO_OUTER] = $value; case 'innertext': if (isset($this->_[HDOM_INFO_TEXT])) return $this->_[HDOM_INFO_TEXT] = $value; return $this->_[HDOM_INFO_INNER] = $value; } if (!isset($this->attr[$name])) { $this->_[HDOM_INFO_SPACE][] = array(' ', '', ''); $this->_[HDOM_INFO_QUOTE][] = HDOM_QUOTE_DOUBLE; } $this->attr[$name] = $value; } function __isset($name) { switch ($name) { case 'outertext': return true; case 'innertext': return true; case 'plaintext': return true; } //no value attr: nowrap, checked selected... return (array_key_exists($name, $this->attr)) ? true : isset($this->attr[$name]); } function __unset($name) { if (isset($this->attr[$name])) unset($this->attr[$name]); } // PaperG - Function to convert the text from one character set to another if the two sets are not the same. function convert_text($text) { global $debugObject; if (is_object($debugObject)) { $debugObject->debugLogEntry(1); } $converted_text = $text; $sourceCharset = ""; $targetCharset = ""; if ($this->dom) { $sourceCharset = strtoupper($this->dom->_charset); $targetCharset = strtoupper($this->dom->_target_charset); } if (is_object($debugObject)) { $debugObject->debugLog(3, "source charset: " . $sourceCharset . " target charaset: " . $targetCharset); } if (!empty($sourceCharset) && !empty($targetCharset) && (strcasecmp($sourceCharset, $targetCharset) != 0)) { // Check if the reported encoding could have been incorrect and the text is actually already UTF-8 if ((strcasecmp($targetCharset, 'UTF-8') == 0) && ($this->is_utf8($text))) { $converted_text = $text; } else { $converted_text = iconv($sourceCharset, $targetCharset, $text); } } return $converted_text; } function is_utf8($string) { return (utf8_encode(utf8_decode($string)) == $string); } // camel naming conventions function getAllAttributes() { return $this->attr; } function getAttribute($name) { return $this->__get($name); } function setAttribute($name, $value) { $this->__set($name, $value); } function hasAttribute($name) { return $this->__isset($name); } function removeAttribute($name) { $this->__set($name, null); } function getElementById($id) { return $this->find("#$id", 0); } function getElementsById($id, $idx = null) { return $this->find("#$id", $idx); } function getElementByTagName($name) { return $this->find($name, 0); } function getElementsByTagName($name, $idx = null) { return $this->find($name, $idx); } function parentNode() { return $this->parent(); } function childNodes($idx = -1) { return $this->children($idx); } function firstChild() { return $this->first_child(); } function lastChild() { return $this->last_child(); } function nextSibling() { return $this->next_sibling(); } function previousSibling() { return $this->prev_sibling(); } } /** * simple html dom parser * Paperg - in the find routine: allow us to specify that we want case insensitive testing of the value of the selector. * Paperg - change $size from protected to public so we can easily access it * Paperg - added ForceTagsClosed in the constructor which tells us whether we trust the html or not. Default is to NOT trust it. * * @package PlaceLocalInclude */ class simple_html_dom { public $root = null; public $nodes = array(); public $callback = null; public $lowercase = false; public $size; protected $pos; protected $doc; protected $char; protected $cursor; protected $parent; protected $noise = array(); protected $token_blank = " \t\r\n"; protected $token_equal = ' =/>'; protected $token_slash = " />\r\n\t"; protected $token_attr = ' >'; protected $_charset = ''; protected $_target_charset = ''; protected $default_br_text = ""; // use isset instead of in_array, performance boost about 30%... protected $self_closing_tags = array('img' => 1, 'br' => 1, 'input' => 1, 'meta' => 1, 'link' => 1, 'hr' => 1, 'base' => 1, 'embed' => 1, 'spacer' => 1); protected $block_tags = array('root' => 1, 'body' => 1, 'form' => 1, 'div' => 1, 'span' => 1, 'table' => 1); // Known sourceforge issue #2977341 // B tags that are not closed cause us to return everything to the end of the document. protected $optional_closing_tags = array( 'tr' => array('tr' => 1, 'td' => 1, 'th' => 1), 'th' => array('th' => 1), 'td' => array('td' => 1), 'li' => array('li' => 1), 'dt' => array('dt' => 1, 'dd' => 1), 'dd' => array('dd' => 1, 'dt' => 1), 'dl' => array('dd' => 1, 'dt' => 1), 'p' => array('p' => 1), 'nobr' => array('nobr' => 1), 'b' => array('b' => 1), ); function __construct($str = null, $lowercase = true, $forceTagsClosed = true, $target_charset = DEFAULT_TARGET_CHARSET, $stripRN = true, $defaultBRText = DEFAULT_BR_TEXT) { if ($str) { if (preg_match("/^http:\/\//i", $str) || is_file($str)) $this->load_file($str); else $this->load($str, $lowercase, $stripRN, $defaultBRText); } // Forcing tags to be closed implies that we don't trust the html, but it can lead to parsing errors if we SHOULD trust the html. if (!$forceTagsClosed) { $this->optional_closing_array = array(); } $this->_target_charset = $target_charset; } function __destruct() { $this->clear(); } // load html from string function load($str, $lowercase = true, $stripRN = true, $defaultBRText = DEFAULT_BR_TEXT) { global $debugObject; // prepare $this->prepare($str, $lowercase, $stripRN, $defaultBRText); // strip out comments $this->remove_noise("'<!--(.*?)-->'is"); // strip out cdata $this->remove_noise("'<!\[CDATA\[(.*?)\]\]>'is", true); // Per sourceforge http://sourceforge.net/tracker/?func=detail&aid=2949097&group_id=218559&atid=1044037 // Script tags removal now preceeds style tag removal. // strip out <script> tags $this->remove_noise("'<\s*script[^>]*[^/]>(.*?)<\s*/\s*script\s*>'is"); $this->remove_noise("'<\s*script\s*>(.*?)<\s*/\s*script\s*>'is"); // strip out <style> tags $this->remove_noise("'<\s*style[^>]*[^/]>(.*?)<\s*/\s*style\s*>'is"); $this->remove_noise("'<\s*style\s*>(.*?)<\s*/\s*style\s*>'is"); // strip out preformatted tags $this->remove_noise("'<\s*(?:code)[^>]*>(.*?)<\s*/\s*(?:code)\s*>'is"); // strip out server side scripts $this->remove_noise("'(<\?)(.*?)(\?>)'s", true); // strip smarty scripts $this->remove_noise("'(\{\w)(.*?)(\})'s", true); // parsing while ($this->parse()) ; // end $this->root->_[HDOM_INFO_END] = $this->cursor; $this->parse_charset(); } // load html from file function load_file() { $args = func_get_args(); $this->load(call_user_func_array('file_get_contents', $args), true); // Per the simple_html_dom repositiry this is a planned upgrade to the codebase. // Throw an error if we can't properly load the dom. if (($error = error_get_last()) !== null) { $this->clear(); return false; } } // set callback function function set_callback($function_name) { $this->callback = $function_name; } // remove callback function function remove_callback() { $this->callback = null; } // save dom as string function save($filepath = '') { $ret = $this->root->innertext(); if ($filepath !== '') file_put_contents($filepath, $ret, LOCK_EX); return $ret; } // find dom node by css selector // Paperg - allow us to specify that we want case insensitive testing of the value of the selector. function find($selector, $idx = null, $lowercase = false) { return $this->root->find($selector, $idx, $lowercase); } // clean up memory due to php5 circular references memory leak... function clear() { foreach ($this->nodes as $n) { $n->clear(); $n = null; } // This add next line is documented in the sourceforge repository. 2977248 as a fix for ongoing memory leaks that occur even with the use of clear. if (isset($this->children)) foreach ($this->children as $n) { $n->clear(); $n = null; } if (isset($this->parent)) { $this->parent->clear(); unset($this->parent); } if (isset($this->root)) { $this->root->clear(); unset($this->root); } unset($this->doc); unset($this->noise); } function dump($show_attr = true) { $this->root->dump($show_attr); } // prepare HTML data and init everything protected function prepare($str, $lowercase = true, $stripRN = true, $defaultBRText = DEFAULT_BR_TEXT) { $this->clear(); // set the length of content before we do anything to it. $this->size = strlen($str); //before we save the string as the doc... strip out the \r \n's if we are told to. if ($stripRN) { $str = str_replace("\r", " ", $str); $str = str_replace("\n", " ", $str); } $this->doc = $str; $this->pos = 0; $this->cursor = 1; $this->noise = array(); $this->nodes = array(); $this->lowercase = $lowercase; $this->default_br_text = $defaultBRText; $this->root = new simple_html_dom_node($this); $this->root->tag = 'root'; $this->root->_[HDOM_INFO_BEGIN] = -1; $this->root->nodetype = HDOM_TYPE_ROOT; $this->parent = $this->root; if ($this->size > 0) $this->char = $this->doc[0]; } // parse html content protected function parse() { if (($s = $this->copy_until_char('<')) === '') return $this->read_tag(); // text $node = new simple_html_dom_node($this); ++$this->cursor; $node->_[HDOM_INFO_TEXT] = $s; $this->link_nodes($node, false); return true; } // PAPERG - dkchou - added this to try to identify the character set of the page we have just parsed so we know better how to spit it out later. // NOTE: IF you provide a routine called get_last_retrieve_url_contents_content_type which returns the CURLINFO_CONTENT_TYPE fromt he last curl_exec // (or the content_type header fromt eh last transfer), we will parse THAT, and if a charset is specified, we will use it over any other mechanism. protected function parse_charset() { global $debugObject; $charset = null; if (function_exists('get_last_retrieve_url_contents_content_type')) { $contentTypeHeader = get_last_retrieve_url_contents_content_type(); $success = preg_match('/charset=(.+)/', $contentTypeHeader, $matches); if ($success) { $charset = $matches[1]; if (is_object($debugObject)) { $debugObject->debugLog(2, 'header content-type found charset of: ' . $charset); } } } if (empty($charset)) { $el = $this->root->find('meta[http-equiv=Content-Type]', 0); if (!empty($el)) { $fullvalue = $el->content; if (is_object($debugObject)) { $debugObject->debugLog(2, 'meta content-type tag found' . $fullValue); } if (!empty($fullvalue)) { $success = preg_match('/charset=(.+)/', $fullvalue, $matches); if ($success) { $charset = $matches[1]; } else { // If there is a meta tag, and they don't specify the character set, research says that it's typically ISO-8859-1 if (is_object($debugObject)) { $debugObject->debugLog(2, 'meta content-type tag couldn\'t be parsed. using iso-8859 default.'); } $charset = 'ISO-8859-1'; } } } } // If we couldn't find a charset above, then lets try to detect one based on the text we got... if (empty($charset)) { // Have php try to detect the encoding from the text given to us. $charset = mb_detect_encoding($this->root->plaintext . "ascii", $encoding_list = array("UTF-8", "CP1252")); if (is_object($debugObject)) { $debugObject->debugLog(2, 'mb_detect found: ' . $charset); } // and if this doesn't work... then we need to just wrongheadedly assume it's UTF-8 so that we can move on - cause this will usually give us most of what we need... if ($charset === false) { if (is_object($debugObject)) { $debugObject->debugLog(2, 'since mb_detect failed - using default of utf-8'); } $charset = 'UTF-8'; } } // Since CP1252 is a superset, if we get one of it's subsets, we want it instead. if ((strtolower($charset) == strtolower('ISO-8859-1')) || (strtolower($charset) == strtolower('Latin1')) || (strtolower($charset) == strtolower('Latin-1'))) { if (is_object($debugObject)) { $debugObject->debugLog(2, 'replacing ' . $charset . ' with CP1252 as its a superset'); } $charset = 'CP1252'; } if (is_object($debugObject)) { $debugObject->debugLog(1, 'EXIT - ' . $charset); } return $this->_charset = $charset; } // read tag info protected function read_tag() { if ($this->char !== '<') { $this->root->_[HDOM_INFO_END] = $this->cursor; return false; } $begin_tag_pos = $this->pos; $this->char = (++$this->pos < $this->size) ? $this->doc[$this->pos] : null; // next // end tag if ($this->char === '/') { $this->char = (++$this->pos < $this->size) ? $this->doc[$this->pos] : null; // next // This represetns the change in the simple_html_dom trunk from revision 180 to 181. // $this->skip($this->token_blank_t); $this->skip($this->token_blank); $tag = $this->copy_until_char('>'); // skip attributes in end tag if (($pos = strpos($tag, ' ')) !== false) $tag = substr($tag, 0, $pos); $parent_lower = strtolower($this->parent->tag); $tag_lower = strtolower($tag); if ($parent_lower !== $tag_lower) { if (isset($this->optional_closing_tags[$parent_lower]) && isset($this->block_tags[$tag_lower])) { $this->parent->_[HDOM_INFO_END] = 0; $org_parent = $this->parent; while (($this->parent->parent) && strtolower($this->parent->tag) !== $tag_lower) $this->parent = $this->parent->parent; if (strtolower($this->parent->tag) !== $tag_lower) { $this->parent = $org_parent; // restore origonal parent if ($this->parent->parent) $this->parent = $this->parent->parent; $this->parent->_[HDOM_INFO_END] = $this->cursor; return $this->as_text_node($tag); } } else if (($this->parent->parent) && isset($this->block_tags[$tag_lower])) { $this->parent->_[HDOM_INFO_END] = 0; $org_parent = $this->parent; while (($this->parent->parent) && strtolower($this->parent->tag) !== $tag_lower) $this->parent = $this->parent->parent; if (strtolower($this->parent->tag) !== $tag_lower) { $this->parent = $org_parent; // restore origonal parent $this->parent->_[HDOM_INFO_END] = $this->cursor; return $this->as_text_node($tag); } } else if (($this->parent->parent) && strtolower($this->parent->parent->tag) === $tag_lower) { $this->parent->_[HDOM_INFO_END] = 0; $this->parent = $this->parent->parent; } else return $this->as_text_node($tag); } $this->parent->_[HDOM_INFO_END] = $this->cursor; if ($this->parent->parent) $this->parent = $this->parent->parent; $this->char = (++$this->pos < $this->size) ? $this->doc[$this->pos] : null; // next return true; } $node = new simple_html_dom_node($this); $node->_[HDOM_INFO_BEGIN] = $this->cursor; ++$this->cursor; $tag = $this->copy_until($this->token_slash); $node->tag_start = $begin_tag_pos; // doctype, cdata & comments... if (isset($tag[0]) && $tag[0] === '!') { $node->_[HDOM_INFO_TEXT] = '<' . $tag . $this->copy_until_char('>'); if (isset($tag[2]) && $tag[1] === '-' && $tag[2] === '-') { $node->nodetype = HDOM_TYPE_COMMENT; $node->tag = 'comment'; } else { $node->nodetype = HDOM_TYPE_UNKNOWN; $node->tag = 'unknown'; } if ($this->char === '>') $node->_[HDOM_INFO_TEXT] .= '>'; $this->link_nodes($node, true); $this->char = (++$this->pos < $this->size) ? $this->doc[$this->pos] : null; // next return true; } // text if ($pos = strpos($tag, '<') !== false) { $tag = '<' . substr($tag, 0, -1); $node->_[HDOM_INFO_TEXT] = $tag; $this->link_nodes($node, false); $this->char = $this->doc[--$this->pos]; // prev return true; } if (!preg_match("/^[\w\-:]+$/", $tag)) { $node->_[HDOM_INFO_TEXT] = '<' . $tag . $this->copy_until('<>'); if ($this->char === '<') { $this->link_nodes($node, false); return true; } if ($this->char === '>') $node->_[HDOM_INFO_TEXT] .= '>'; $this->link_nodes($node, false); $this->char = (++$this->pos < $this->size) ? $this->doc[$this->pos] : null; // next return true; } // begin tag $node->nodetype = HDOM_TYPE_ELEMENT; $tag_lower = strtolower($tag); $node->tag = ($this->lowercase) ? $tag_lower : $tag; // handle optional closing tags if (isset($this->optional_closing_tags[$tag_lower])) { while (isset($this->optional_closing_tags[$tag_lower][strtolower($this->parent->tag)])) { $this->parent->_[HDOM_INFO_END] = 0; $this->parent = $this->parent->parent; } $node->parent = $this->parent; } $guard = 0; // prevent infinity loop $space = array($this->copy_skip($this->token_blank), '', ''); // attributes do { if ($this->char !== null && $space[0] === '') break; $name = $this->copy_until($this->token_equal); if ($guard === $this->pos) { $this->char = (++$this->pos < $this->size) ? $this->doc[$this->pos] : null; // next continue; } $guard = $this->pos; // handle endless '<' if ($this->pos >= $this->size - 1 && $this->char !== '>') { $node->nodetype = HDOM_TYPE_TEXT; $node->_[HDOM_INFO_END] = 0; $node->_[HDOM_INFO_TEXT] = '<' . $tag . $space[0] . $name; $node->tag = 'text'; $this->link_nodes($node, false); return true; } // handle mismatch '<' if ($this->doc[$this->pos - 1] == '<') { $node->nodetype = HDOM_TYPE_TEXT; $node->tag = 'text'; $node->attr = array(); $node->_[HDOM_INFO_END] = 0; $node->_[HDOM_INFO_TEXT] = substr($this->doc, $begin_tag_pos, $this->pos - $begin_tag_pos - 1); $this->pos -= 2; $this->char = (++$this->pos < $this->size) ? $this->doc[$this->pos] : null; // next $this->link_nodes($node, false); return true; } if ($name !== '/' && $name !== '') { $space[1] = $this->copy_skip($this->token_blank); $name = $this->restore_noise($name); if ($this->lowercase) $name = strtolower($name); if ($this->char === '=') { $this->char = (++$this->pos < $this->size) ? $this->doc[$this->pos] : null; // next $this->parse_attr($node, $name, $space); } else { //no value attr: nowrap, checked selected... $node->_[HDOM_INFO_QUOTE][] = HDOM_QUOTE_NO; $node->attr[$name] = true; if ($this->char != '>') $this->char = $this->doc[--$this->pos]; // prev } $node->_[HDOM_INFO_SPACE][] = $space; $space = array($this->copy_skip($this->token_blank), '', ''); } else break; } while ($this->char !== '>' && $this->char !== '/'); $this->link_nodes($node, true); $node->_[HDOM_INFO_ENDSPACE] = $space[0]; // check self closing if ($this->copy_until_char_escape('>') === '/') { $node->_[HDOM_INFO_ENDSPACE] .= '/'; $node->_[HDOM_INFO_END] = 0; } else { // reset parent if (!isset($this->self_closing_tags[strtolower($node->tag)])) $this->parent = $node; } $this->char = (++$this->pos < $this->size) ? $this->doc[$this->pos] : null; // next // If it's a BR tag, we need to set it's text to the default text. // This way when we see it in plaintext, we can generate formatting that the user wants. if ($node->tag == "br") { $node->_[HDOM_INFO_INNER] = $this->default_br_text; } return true; } // parse attributes protected function parse_attr($node, $name, &$space) { // Per sourceforge: http://sourceforge.net/tracker/?func=detail&aid=3061408&group_id=218559&atid=1044037 // If the attribute is already defined inside a tag, only pay atetntion to the first one as opposed to the last one. if (isset($node->attr[$name])) { return; } $space[2] = $this->copy_skip($this->token_blank); switch ($this->char) { case '"': $node->_[HDOM_INFO_QUOTE][] = HDOM_QUOTE_DOUBLE; $this->char = (++$this->pos < $this->size) ? $this->doc[$this->pos] : null; // next $node->attr[$name] = $this->restore_noise($this->copy_until_char_escape('"')); $this->char = (++$this->pos < $this->size) ? $this->doc[$this->pos] : null; // next break; case '\'': $node->_[HDOM_INFO_QUOTE][] = HDOM_QUOTE_SINGLE; $this->char = (++$this->pos < $this->size) ? $this->doc[$this->pos] : null; // next $node->attr[$name] = $this->restore_noise($this->copy_until_char_escape('\'')); $this->char = (++$this->pos < $this->size) ? $this->doc[$this->pos] : null; // next break; default: $node->_[HDOM_INFO_QUOTE][] = HDOM_QUOTE_NO; $node->attr[$name] = $this->restore_noise($this->copy_until($this->token_attr)); } // PaperG: Attributes should not have \r or \n in them, that counts as html whitespace. $node->attr[$name] = str_replace("\r", "", $node->attr[$name]); $node->attr[$name] = str_replace("\n", "", $node->attr[$name]); // PaperG: If this is a "class" selector, lets get rid of the preceeding and trailing space since some people leave it in the multi class case. if ($name == "class") { $node->attr[$name] = trim($node->attr[$name]); } } // link node's parent protected function link_nodes(&$node, $is_child) { $node->parent = $this->parent; $this->parent->nodes[] = $node; if ($is_child) $this->parent->children[] = $node; } // as a text node protected function as_text_node($tag) { $node = new simple_html_dom_node($this); ++$this->cursor; $node->_[HDOM_INFO_TEXT] = '</' . $tag . '>'; $this->link_nodes($node, false); $this->char = (++$this->pos < $this->size) ? $this->doc[$this->pos] : null; // next return true; } protected function skip($chars) { $this->pos += strspn($this->doc, $chars, $this->pos); $this->char = ($this->pos < $this->size) ? $this->doc[$this->pos] : null; // next } protected function copy_skip($chars) { $pos = $this->pos; $len = strspn($this->doc, $chars, $pos); $this->pos += $len; $this->char = ($this->pos < $this->size) ? $this->doc[$this->pos] : null; // next if ($len === 0) return ''; return substr($this->doc, $pos, $len); } protected function copy_until($chars) { $pos = $this->pos; $len = strcspn($this->doc, $chars, $pos); $this->pos += $len; $this->char = ($this->pos < $this->size) ? $this->doc[$this->pos] : null; // next return substr($this->doc, $pos, $len); } protected function copy_until_char($char) { if ($this->char === null) return ''; if (($pos = strpos($this->doc, $char, $this->pos)) === false) { $ret = substr($this->doc, $this->pos, $this->size - $this->pos); $this->char = null; $this->pos = $this->size; return $ret; } if ($pos === $this->pos) return ''; $pos_old = $this->pos; $this->char = $this->doc[$pos]; $this->pos = $pos; return substr($this->doc, $pos_old, $pos - $pos_old); } protected function copy_until_char_escape($char) { if ($this->char === null) return ''; $start = $this->pos; while (1) { if (($pos = strpos($this->doc, $char, $start)) === false) { $ret = substr($this->doc, $this->pos, $this->size - $this->pos); $this->char = null; $this->pos = $this->size; return $ret; } if ($pos === $this->pos) return ''; if ($this->doc[$pos - 1] === '\\') { $start = $pos + 1; continue; } $pos_old = $this->pos; $this->char = $this->doc[$pos]; $this->pos = $pos; return substr($this->doc, $pos_old, $pos - $pos_old); } } // remove noise from html content protected function remove_noise($pattern, $remove_tag = false) { $count = preg_match_all($pattern, $this->doc, $matches, PREG_SET_ORDER | PREG_OFFSET_CAPTURE); for ($i = $count - 1; $i > -1; --$i) { $key = '___noise___' . sprintf('% 3d', count($this->noise) + 100); $idx = ($remove_tag) ? 0 : 1; $this->noise[$key] = $matches[$i][$idx][0]; $this->doc = substr_replace($this->doc, $key, $matches[$i][$idx][1], strlen($matches[$i][$idx][0])); } // reset the length of content $this->size = strlen($this->doc); if ($this->size > 0) $this->char = $this->doc[0]; } // restore noise to html content function restore_noise($text) { while (($pos = strpos($text, '___noise___')) !== false) { $key = '___noise___' . $text[$pos + 11] . $text[$pos + 12] . $text[$pos + 13]; if (isset($this->noise[$key])) // $text = simple_html_dom . phpsubstr($text, 0, $pos) . $this->noise[$key] . substr($text, $pos + 14); $text = substr($text, 0, $pos).$this->noise[$key].substr($text, $pos+14); } return $text; } function __toString() { return $this->root->innertext(); } function __get($name) { switch ($name) { case 'outertext': return $this->root->innertext(); case 'innertext': return $this->root->innertext(); case 'plaintext': return $this->root->text(); case 'charset': return $this->_charset; case 'target_charset': return $this->_target_charset; } } // camel naming conventions function childNodes($idx = -1) { return $this->root->childNodes($idx); } function firstChild() { return $this->root->first_child(); } function lastChild() { return $this->root->last_child(); } function getElementById($id) { return $this->find("#$id", 0); } function getElementsById($id, $idx = null) { return $this->find("#$id", $idx); } function getElementByTagName($name) { return $this->find($name, 0); } function getElementsByTagName($name, $idx = -1) { return $this->find($name, $idx); } function loadFile() { $args = func_get_args(); $this->load_file($args); } } ?> 引用1.php-simple-html-dom-parser for PHP7.3 +:https://github.com/sunra/php-simple-html-dom-parser/issues/75
-
Laravel Blade分页模板 自带的有点丑,整个模板换掉模板放在/resources/views/vendor/pagination/bootstrap-3.blade.php<nav aria-label="Page navigation example"> <ul class="stui-page text-center clearfix"> <li><a href="{{ $paginator->url(1) }}">首页</a></li> <li><a href="{{ $paginator->previousPageUrl() }}">上一页</a></li> @if($paginator->onFirstPage()) <li class="hidden-xs active"><a href="{{ $paginator->url(1) }}">1</a></li> @for($i = 2;$i <= (($paginator->lastPage() > 5) ? 5 : $paginator->lastPage());$i++) <!-- 判断当前数据总数是否能够渲染当前页面 --> <li class="hidden-xs"><a href="{{ $paginator->appends(request()->query())->url($i) }}">{{ $i }}</a></li> @endfor @elseif(!$paginator->hasMorePages()) @for($i = $paginator->lastPage() - 3;$i <= $paginator->lastPage();$i++) <li class="hidden-xs"><a href="{{ $paginator->url($i) }}">{{ $i }}</a></li> @endfor <li class="hidden-xs active"><a href="{{ $paginator->url($paginator->lastPage()) }}">{{ $paginator->lastPage() }}</a></li> @else <!-- 分页功能显示中间部分 --> @for($i = $paginator->currentPage() - 2; $i <= $paginator->currentPage() + 2; $i++) @if($i > 0) @if($i == $paginator->currentPage()) <li class="hidden-xs active"><a href="{{ $paginator->url($i) }}">{{ $i }}</a></li> @else <li class="hidden-xs"><a href="{{ $paginator->url($i) }}">{{ $i }}</a></li> @endif @endif @endfor @endif <li class="active"><span class="num">{{ $paginator->currentPage() }}/{{ $paginator->lastPage() }}</span></li> <li><a href="{{ $paginator->nextPageUrl() }}">下一页</a></li> <li><a href="{{ $paginator->url($paginator->lastPage()) }}">尾页</a></li> </ul> </nav>样式:.stui-page li { display: inline-block; margin-left: 10px; } ul, ol, li, dt, dd { margin: 0; padding: 0; list-style: none; } .stui-page li .num, .stui-page li a { display: inline-block; padding: 5px 15px; border-radius: 4px; background-color: #fff; border: 1px solid #eee; } .stui-page li.active a, .stui-page li.disabled a { background-color: #f2990d; border: 1px solid #f2990d; color: #fff; } a, h1, h2, h3, h4, h5, h6 { color: #333333; } a, button { text-decoration: none; outline: none; -webkit-tap-highlight-color: rgba(0,0,0,0); }有些class是Boostrap3的在其他文件中使用时,如下@component('vendor.pagination.bootstrap-3', ['paginator' => $videoList]) @endcomponent
-
利用AList搭建家庭个人影音库 利用AList搭建家庭个人影音库1.Docker运行AListdocker run -d --restart=always -v /etc/alist:/opt/alist/data -p 5244:5244 --name="alist" xhofe/alist:latest查看运行状态docker ps部署成功,可以访问:IP地址:5244查看2.查看初始密码初始密码请查看日志输出:docker logs alist # 或者 docker exec -it alist ./alist -password3.添加一个存储以小雅为例:主页 | 小雅的分类 Alist (xiaoya.pro)驱动:AList V3挂载路径: /小雅链接:http://alist.xiaoya.pro/4.虚拟机部署家庭使用收购一台服务器或者使用群晖来部署当使用VM ware部署时,为了让手机、其他电脑、电视多设备访问,需要做一些操作。4.1 主机防火墙开放端口入站规则添加TCP方式端口:52444.2 虚拟机端口转发由于虚拟机采用的是Nat联网方式,菜单->编辑->虚拟网络编辑器->更改设置选择VMnet8网络,点击NAT设置添加端口转发规则4.3 服务器开放端口# install ufw sudo apt update sudo apt install ufw # allow port sudo uft allow 5244 4.4 同局域网内,手机直接访问笔记本的IP:Port5.几个资源站小雅:主页 | 小雅的分类 Alist (xiaoya.pro)Puppet Studi:主页 | Puppet Studio (kugutsu.ml)七米蓝:Alist (chirmyram.com)Banana的资源站:主页 | Media Center (advanced360.top)小瑞:小瑞 (bestruirui.repl.co)Arley's Drive:Arley's Drive微资源:资源站.随意盘 (weixinqqq.com)引用1.AList Document:https://alist-doc.nn.ci/2.手机如何连接VMware虚拟机中的服务器:https://blog.csdn.net/u014595668/article/details/501386353.Ubuntu20.04开放指定端口:https://blog.csdn.net/lianghecai52171314/article/details/1138138264.Alist搭建免费百T空间的个人影视库,免下载直接看#Alist #小雅Alist #网盘资源 #电脑 #自建服务 #webdav #影音库: https://www.douyin.com/video/7184075934528589095
-
常用链接记录 镜像|仓库类名字地址描述清华大学开源软件镜像站https://mirrors.tuna.tsinghua.edu.cn/ubuntu-releases/20.04/高速下载Ubuntu镜像阿里云开源镜像站http://mirrors.aliyun.com/centos/7/isos/x86_64/高速下载CentOs7镜像Packagisthttps://packagist.org/Composer包检索Maven搜索http://mvn.coderead.cn/最快捷的Maven搜索BootCDNhttps://www.bootcdn.cn/前端资源CDNStaticfile CDNhttp://staticfile.org/前端资源CDN接码平台名字地址描述SMS-Activatehttps://sms-activate.org/...算法刷题名字地址描述LeetCodehttps://leetcode.cn/...啊哈添柴https://www.acoj.com/在线OJAcWinghttps://www.acwing.com/problem/题库LintCodehttps://www.lintcode.com/problem/...资源下载名字地址描述Project Gutenberghttps://www.gutenberg.org/Welcome to Project Gutenberg,Project Gutenberg is a library of over 70,000 free eBooks语言学习英语名字地址描述同桌英语https://cet.itongzhuo.com/fourSixExam/student/Index.jsp?meType=0同桌英语是专业的英语学习交流平台,为大家提供了历年英语四六级真题及答案解析,帮助大家更好更快的学习英文四六级考试内容,希望丰富的题库能快速帮助您解决学习英语中遇到的问题。英语真题在线https://zhenti.burningvocabulary.com/英语真题在线YouZack-英语听力精听、背单词https://www.youzack.com/YouZack-英语听力精听、背单词
-
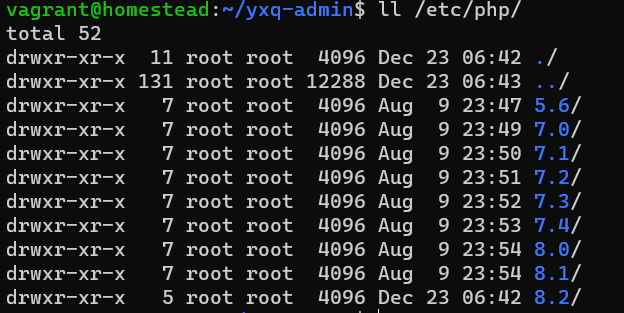
Homestead中PHP版本问题 Homestead中PHP版本问题1.项目运行时PHP版本1.1 查看Homestead中可用的PHP版本ll /etc/php可用版本是有许多的默认Homestead环境使用的是最新的PHP 8.1.8:1.2 切换项目使用版本在Homestead.yaml文件中进行配置:... sites: - map: yxq.test to: /home/vagrant/yxq-admin/public php: "7.3" ...然后重载一下虚拟机vagrant reload --provision2.Composer使用版本项目是从Github上Clone下来的,在composer update时报了一堆错误看了一下已上线的环境使用的PHP 7.3当我直接使用composer update时,默认会调用环境变量中的PHP 8.1查看一下PHP的环境变量设置whereis php发现各个版本都是有的,只是调用时候要加上版本号所以只能放弃全局的Composer,单独在项目中下载一个composer.pharphp7.3 composer.phar update之后的所有对artisan的操作,都要使用php7.3 artisan ...的方式了,避免因为版本不正确而导致错误发生。PS:可以直接更换环境变量,一劳永逸,我主用的还是最新版 所以没必要换了。# 安装完新项目的依赖后,要拷贝一下.env vagrant@homestead:~/yxq-admin$ cp .env.example .env # 生成key vagrant@homestead:~/yxq-admin$ php7.3 artisan key:generate Application key set successfully.接下来数据库迁移修改一下.envDB_DATABASE=yxq DB_USERNAME=homestead DB_PASSWORD=secret执行迁移php7.3 artisan migrate3.Vagrant常用命令序号命令解释1vagrant up启动虚拟机2vagrant ssh登录虚拟机 通过 exit 退出3vagrant status查看虚拟机状态4vagrant halt关机5vagrant destroy删除虚拟机6vagrant reload --provision修改配置文件后重载引用1.Laravel Homestead:https://laravel.com/docs/9.x/homestead#main-content2.composer.phar Download: https://getcomposer.org/download/3.多版本php环境,指定composer 使用的php版本: https://segmentfault.com/q/10100000126268834.homestead 添加新站点:https://www.cnblogs.com/cjjjj/p/9420844.html
-
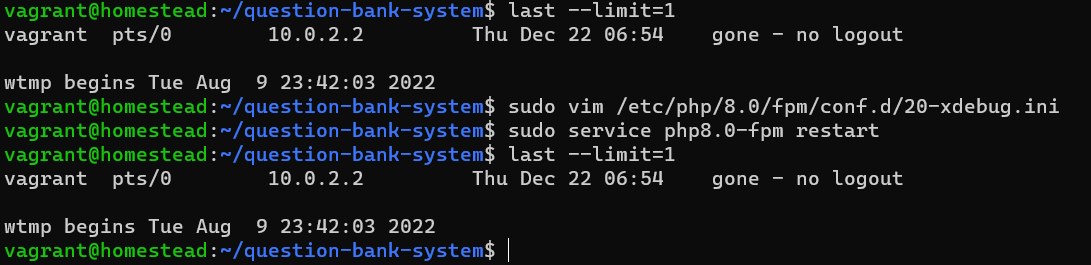
How to set up debugging with PhpStorm and Homestead 20-xdebug.inizend_extension=xdebug.so xdebug.mode = debug xdebug.discover_client_host = false xdebug.client_host = 10.0.2.2 xdebug.client_port = 9000 xdebug.max_nesting_level = 512 xdebug.start_with_request = trigger xdebug.idekey = PHPSTORM引用1.How to set up debugging with PhpStorm and Homestead:https://dev.to/daniel_werner/how-to-set-up-debugging-with-phpstorm-and-homestead-484g2.How to setup Xdebug with PhpStorm and Laravel Homestead:https://www.youtube.com/watch?v=F7PKs_U4mQg&t=351s&ab_channel=JeezyCarry
-
Vue3+Ts封装Axios及Vue的Proxy配置 一、开箱即用的axios封装:Vue3+ts作者:诸葛小愚链接:https://juejin.cn/post/7107047280133275678来源:稀土掘金著作权归作者所有。商业转载请联系作者获得授权,非商业转载请注明出处。新建index.ts文件:需要定义请求返回的数据格式,这个可以和服务端约定好数据格式需要定义axios的配置信息,用于在创建axios实例时传入请求拦截器,前端所有的接口请求都会先达到请求拦截器,我们可以在此添加请求头信息响应拦截器,服务端返回的数据会先达到响应拦截器,我们可以处理服务端的响应信息。如果是报错,就处理常见的报错;如果是成功,就返回数据封装常用的get、put、post、delete接口方法封装axiosimport axios, {AxiosInstance, AxiosError, AxiosRequestConfig, AxiosResponse} from 'axios' import {ElMessage} from 'element-plus' // 数据返回的接口 // 定义请求响应参数,不含data interface Result { code: number; msg: string } // 请求响应参数,包含data interface ResultData<T = any> extends Result { data?: T; } const URL: string = '' enum RequestEnums { TIMEOUT = 20000, OVERDUE = 600, // 登录失效 FAIL = 999, // 请求失败 SUCCESS = 200, // 请求成功 } const config = { // 默认地址 baseURL: URL as string, // 设置超时时间 timeout: RequestEnums.TIMEOUT as number, // 跨域时候允许携带凭证 withCredentials: true } class RequestHttp { // 定义成员变量并指定类型 service: AxiosInstance; public constructor(config: AxiosRequestConfig) { // 实例化axios this.service = axios.create(config); /** * 请求拦截器 * 客户端发送请求 -> [请求拦截器] -> 服务器 * token校验(JWT) : 接受服务器返回的token,存储到vuex/pinia/本地储存当中 */ this.service.interceptors.request.use( (config: AxiosRequestConfig) => { const token = localStorage.getItem('token') || ''; return { ...config, headers: { 'x-access-token': token, // 请求头中携带token信息 } } }, (error: AxiosError) => { // 请求报错 Promise.reject(error) } ) /** * 响应拦截器 * 服务器换返回信息 -> [拦截统一处理] -> 客户端JS获取到信息 */ this.service.interceptors.response.use( (response: AxiosResponse) => { const {data, config} = response; // 解构 if (data.code === RequestEnums.OVERDUE) { // 登录信息失效,应跳转到登录页面,并清空本地的token localStorage.setItem('token', ''); // router.replace({ // path: '/login' // }) return Promise.reject(data); } // 全局错误信息拦截(防止下载文件得时候返回数据流,没有code,直接报错) if (data.code && data.code !== RequestEnums.SUCCESS) { ElMessage.error(data); // 此处也可以使用组件提示报错信息 return Promise.reject(data) } return data; }, (error: AxiosError) => { const {response} = error; if (response) { this.handleCode(response.status) } if (!window.navigator.onLine) { ElMessage.error('网络连接失败'); // 可以跳转到错误页面,也可以不做操作 // return router.replace({ // path: '/404' // }); } } ) } handleCode(code: number):void { switch(code) { case 401: ElMessage.error('登录失败,请重新登录'); break; default: ElMessage.error('请求失败'); break; } } // 常用方法封装 get<T>(url: string, params?: object): Promise<ResultData<T>> { return this.service.get(url, {params}); } post<T>(url: string, params?: object): Promise<ResultData<T>> { return this.service.post(url, params); } put<T>(url: string, params?: object): Promise<ResultData<T>> { return this.service.put(url, params); } delete<T>(url: string, params?: object): Promise<ResultData<T>> { return this.service.delete(url, {params}); } } // 导出一个实例对象 export default new RequestHttp(config);实际使用在使用时,我们需要在API文档中导入index.ts,会自动创建一个axios实例。我们在同目录下,新建一个login.tsimport axios from './' namespace Login { // 用户登录表单 export interface LoginReqForm { username: string; password: string; } // 登录成功后返回的token export interface LoginResData { token: string; } } // 用户登录 export const login = (params: Login.LoginReqForm) => { // 返回的数据格式可以和服务端约定 return axios.post<Login.LoginResData>('/user/login', params); }API接口也定义好了,再来一个页面简单试试:<script setup> import { reactive } from 'vue'; import {login} from '@/api/login.js' const loginForm = reactive({ username: '', password: '' }) const Login = async () => { const data = await login(loginForm) console.log(data); } </script> <template> <input v-model="loginForm.username" /> <input v-model="loginForm.password" type="password" /> <button @click="Login">登录</button> </template>二、Vue通过Proxy访问不同端口的API后台API使用Springboot开发,部署端口为81251.Vue项目根目录创建vue.config.jsmodule.exports = { devServer: { open: true, host: "127.0.0.1", port: 7123, hot: true, proxy: { "/api": { target: "http://localhost:8125", // 代理地址,这里设置的地址会代替axios中设置的baseURL changeOrigin: true, // 是否跨域 ws: false, // 如果要代理 websockets,配置这个参数 pathRewrite: { "^/api": "", }, }, }, }, };2.示例请求apis/index.ts... const URL = "/api"; ...apis/register.ts... // 用户注册 export const register = (params: RegisterReqForm) => { return axios.post<number>("/user/register", params); }; ...pages/login/Login.ts... async handleRegisterSubmit() { const data = await register(this.registerForm); message.success("用户注册成功"); }, ...根据如上代码可得请求地址为:/api/user/register,并没有host代理后的地址为:http://127.0.0.1:8125/user/register这样就实现前端127.0.0.1:7123代理请求访问127.0.0.1:8125引用1.开箱即用的axios封装:Vue3+ts:https://juejin.cn/post/7107047280133275678#heading-22.Proxy error: Could not proxy request... 问题解决:https://blog.csdn.net/ymiandi/article/details/125674056
-
APP渗透-HttpCanary/BurpSuite/Fiddler抓模拟器网络请求(解决系统级证书问题) HttpCanary/BurpSuite/Fiddler抓模拟器网络请求(解决系统级证书问题)目标应用:学某通APP夜神模拟器使用的国际版 Google Drive:https://en.bignox.com/众所周知,假如设备是android 7.0+的系统同时应用设置targetSdkVersion >= 24的话,那么应用默认是不信任安装的Fiddler用户证书的,所以你就没法抓到应用发起的https请求,然后你在Fiddler就会看到一堆200 HTTP Tunnel to xxx.xxx.xxx:443的请求日志,这些都是没有成功抓取的https请求,下面重点介绍一下各种解决方案,相信总有一款解决方案适合你~一、BurpSuite1.1.配置代理监听192.168.0.106的为手动添加的本机IP,端口自定义为8888。1.2 开始导出证书1.3 证书转换证书创建完成,打开git bash 调用openssl对证书文件进行变动执行的命令:openssl x509 -inform DER -in PortSwiggerCA.crt -out PortSwiggerCA.pem openssl x509 -inform PEM -subject_hash_old -in PortSwiggerCA.pem|head -1 mv PortSwiggerCA.pem <hash>.01.4 将.0推送进模拟器系统级证书的存储路径为:/system/etc/security/文件夹用户级证书的存储路径为:/data/misc/keystore文件夹1.4.1 小白方法直接使用夜神模拟器的界面通过与主机共享文件夹的方式,将hash.0导入系统1.4.2 命令行方式1.切换到夜神模拟器安装目录.../Nox/bin处打开命令行# 1.进入adb shell,执行: .\nox_adb.exe shell # 2.开启模拟器/system读写权限,即以rw的方式 重新挂载/system mount -o remount -o rw /system # 3.证书文件推入模拟器 .\nox_adb.exe push 证书路径 /system/etc/security/cacerts2.出于安全考虑,事后要以readOnly方式重新挂载一下/system# 1.进入adb shell,执行: .\nox_adb.exe shell # 2.关闭模拟器/system写入权限,即以ro的方式 重新挂载/system mount -o remount -o ro /system1.5 验证是否成功模拟器:设置 > 安全 > 信任的凭据二、Fiddler一些基础配置就不说了,本文结束的引用文章中也有提及,可以参考重点描述解决SSL证书问题2.1 导出证书2.2 证书转换openssl x509 -inform DER -in FiddlerRoot.cer -out FiddlerRoot.pem openssl x509 -inform PEM -subject_hash_old -in FiddlerRoot.pem|head -1 mv FiddlerRoot.pem <hash>.02.3 将.0推送进模拟器2.3.1 小白方法1.打开主机的共享文件夹2.将转换后的证书拖入3.模拟器(已ROOT)使用mt管理器打开对应的文件夹,并将其复制到/system/etc/security/4.为了不出问题,再为269953fb.0赋予一下权限6442.3.2 命令行方式参考1.4.22.4 验证是否成功模拟器:设置 > 安全 > 信任的凭据三、Http Canary(小黄鸟)相比BurpSuite和Fiddler来说,配置最简单,但是分析的话也在手机上就不太方便了3.1 导出证书位置:设置 > SSL证书设置 > 导出HttpCanary根证书证书导出保存的目录为:HttpCanary/cert/<hash>.03.2 复制到系统级证书目录修改一下证书权限644,可参考2.3.1su chmod 644 87bc3517.03.3 验证是否成功emm,测试失败了可能是这个小黄鸟版本有些不对,导致默认的证书安装不了,无限弹图案验证好吧,有了BurpSuite和Fiddler能用也不在乎这只鸟了引用1.通过adb pull和adb push 手机与电脑之间传输文件:https://blog.csdn.net/Jackson_Wen/article/details/519311402.adb向手机写入文件,Read-only file system:https://blog.csdn.net/wlwh90/article/details/455616793.《Fiddler+夜神模拟器App抓包配置》:https://juejin.cn/post/70975253514373038384.Android 7.0+模拟器Fiddler抓包详细教程 :https://blog.csdn.net/qq_43278826/article/details/1242910405.BurpSuite v2022.12汉化无cmd框版(2022.11.26更新): https://www.52pojie.cn/thread-1544866-1-1.html6.BurpSuite激活教程:https://www.52pojie.cn/thread-1697625-1-1.html7.BurpSuite Pro 2022.11 : https://www.52pojie.cn/forum.php?mod=viewthread&tid=1709583&extra=&highlight=burp&page=18.Win32/Win64 OpenSSL Download : http://slproweb.com/products/Win32OpenSSL.html9.Fiddler抓包夜神模拟器 : https://blog.csdn.net/hsc93170/article/details/12611584610.Fiddler 抓包 Android :https://moeci.com/posts/2022/01/fiddler-android/11.Android 7.0 + 配置BurpSuite证书 https://blog.csdn.net/LeeHDsniper/article/details/107502428