搜索到
6
篇与
的结果
-
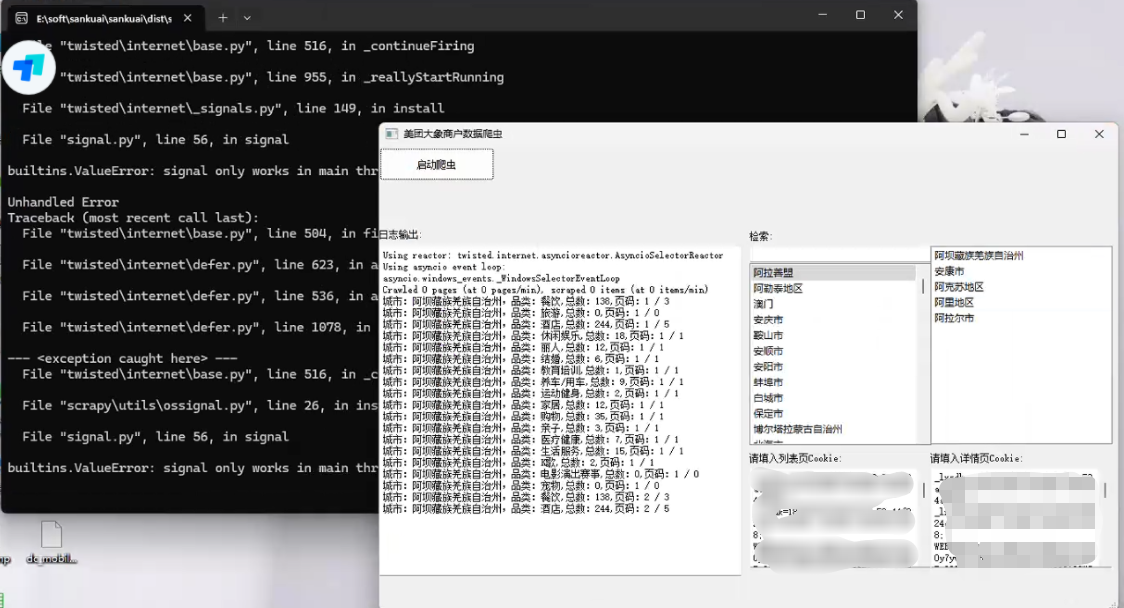
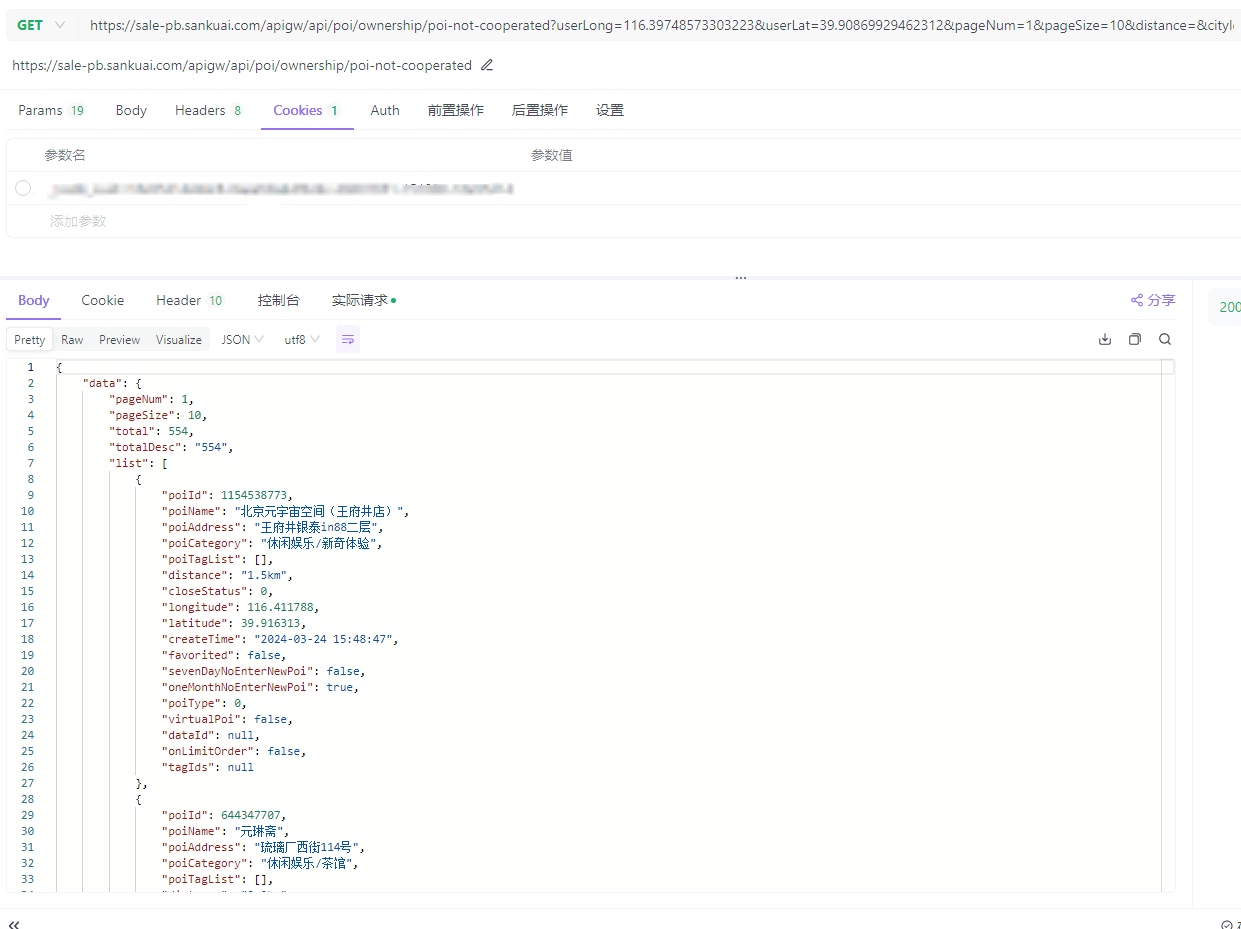
 美团旗下大象商户数据爬虫2-为爬虫绘制GUI并打包 前言公司最近的业务,继上文:https://lisok.cn/python/552.htmlcmd命令的使用有点麻烦,于是学习了一下PyQt5画了一个GUI实现有几个点需要提一下这里的日志输出是给logging添加了拦截器日志内容分成两部分如图,其中store记录的是自己代码中打印的,scrapy.utils.log是scrapy内部记录的一些日志统一添加一个handler处理 回调显示在界面上。store.pyfrom ui.mainwindow import signal class MyCustomHandler(logging.Handler): def __init__(self, signals): super(MyCustomHandler, self).__init__() self.signals = signals def emit(self, record): log_message = self.format(record) # 发送消息到 PyQt 界面 self.signals.log_signal.emit(log_message) class StoreSpider(scrapy.Spider): name = "store" allowed_domains = ["sale-pb.sankuai.com", 'crm.sankuai.com'] start_urls = ["https://sale-pb.sankuai.com/apigw/api/poi/ownership/poi-not-cooperated"] baseinfo_url = 'https://crm.sankuai.com/poi/sales/report/baseinfo?shopId={}' pageSize = 60 pageNum = 1 startCategoryId = 0 startRequest = True infoHeaders = {"Content-Type": "application/json; charset=UTF-8"} custom_settings = { 'LOG_LEVEL': 'INFO', 'LOG_FILE': 'sankuai-cus.log', } def __init__(self, *args, **kwargs): log_names = ['store', 'scrapy.utils.log', 'scrapy.extensions.logstats'] # 'scrapy.addons', 'scrapy.extensions.telnet', 'scrapy.middleware', # 'scrapy.crawler', 'scrapy.core.engine', for log_name in log_names: logging.getLogger(log_name).addHandler(MyCustomHandler(signal)) super().__init__(*args, **kwargs) # 设置Cookie self.cookies = kwargs.get('cookies', []) self.crawl_cities_ids = kwargs.get('crawl_cities_ids', []) # ....mainwindow.pyfrom PyQt5.QtCore import QThread, pyqtSignal, QObject from .ui_main_window.ui_mainwindow import Ui_MainWindow cities = [] class MySignal(QObject): log_signal = pyqtSignal(str) signal = MySignal() cookies = [] crawl_cities_ids = [] # ...其他的代码都很常规,打个包记录一下{cloud title="美团-大象商户爬虫.zip" type="bd" url="/我的分享/美团-大象商户爬虫.zip" password=""/}引用1.python scrapy框架 日志文件:https://blog.csdn.net/weixin_45459224/article/details/1001425372.[Python自学] PyQT5-子线程更新UI数据、信号槽自动绑定、lambda传参、partial传参、覆盖槽函数:https://www.cnblogs.com/leokale-zz/p/13131953.html3.[ PyQt入门教程 ] PyQt5中多线程模块QThread使用方法:https://www.cnblogs.com/linyfeng/p/12239856.html4.Scrapy Logging:https://docs.scrapy.org/en/latest/topics/logging.html#logging-configuration5.在线程中启动scrapy以及多次启动scrapy报错的解决方案(ERROR:root:signal only works in main thread):https://blog.csdn.net/Pual_wang/article/details/106466017
 -
 美团旗下大象商户数据爬虫1-Python将Scrapy程序打包成exe 本文开发环境:Python3.9前言最近公司有业务开展到爬美团下 大象的商户信息# 主要是这两个域名 allowed_domains = ["sale-pb.sankuai.com", 'crm.sankuai.com']Pycharm在开发机器上采集占用太高了,于是想打包成exe部署到服务器上跑环境配置包配置:包名版本Scrapy2.11.1pyinstaller6.5.0 步骤一、编写程序入口参考官方文档:https://doc.scrapy.org/en/latest/topics/practices.htmlsankuai/run.pyfrom scrapy.crawler import CrawlerProcess from scrapy.utils.project import get_project_settings # 下面的包是项目中用到的包,根据自己的项目自行添加,也可以根据打包运行的报错信息,逐个添加 import js2xml import os settings = get_project_settings() process = CrawlerProcess(settings) process.crawl('store') # 填入你需要运行的文件名 process.start()二、数据保存本来是想用FEED来保存数据,可以通过控制台来控制保存地址sankuai/run.pysettings = get_project_settings() settings.setdict({ 'FEED_FORMAT': 'csv', 'FEED_URI': os.path.join(os.path.dirname(os.path.abspath(__file__)), 'data.csv') }, priority="project") process = CrawlerProcess(settings)但是测试发现只会创建文件,并不会写入数据,这里没有解决 有后续了再贴替代方案使用pipeline.pysankuai/sankuai/pipeline.pyclass SankuaiPipeline: def __init__(self): # data文件夹不存在则创建 if not os.path.exists('./data'): os.mkdir('./data') def process_item(self, item, spider): with open('./data/' + item.get('cityName') + '.csv', 'a+', encoding='gbk', newline='') as f: writer = csv.writer(f) writer.writerow((item.get('cityName'), item.get('phone'), item.get('phone2'))) return item sankuai/sankuai/settings.py# ... # Configure item pipelines # See https://docs.scrapy.org/en/latest/topics/item-pipeline.html ITEM_PIPELINES = { "sankuai.pipelines.SankuaiPipeline": 300, } # ...三、打包打包执行命令:pyinstaller.exe .\run.py打包后的文件会位于sankuai/dist/run/run.exe,通过cmd运行项目中读取的文件需要放到同一个运行目录中,我这里是category.json和city.json还有两个Cookie文件四、运行出现KeyError: 'Spider not found:爬虫名,可以将项目源码和打包程序放在一块,即打包时生成时的目录结构,不要改变,拷贝时连同项目整体拷贝,亲测有效。打包时直接将sankuai目录压缩了,不然会出现其他问题,当然安全性没有保障(源码都泄露出去了)公司自用就无所谓了引用1.python 将Scrapy项目打包成exe及注意事项 :https://www.cnblogs.com/zhengxianfa/p/16767965.html2.【scrapy打包】使用pyinstaller将scrapy项目打包成独立可执行exe,及可能遇到的问题和解决方法:https://blog.csdn.net/qq_51543898/article/details/1368468103.The application can not locate Python39.dll (126)找不到指定的模块。解决方法:https://blog.csdn.net/wushaoqiu2011/article/details/1101824974.用Pyinstaller打包Scrapy项目问题解决!!!:https://pyqt5.blog.csdn.net/article/details/79017358
 -
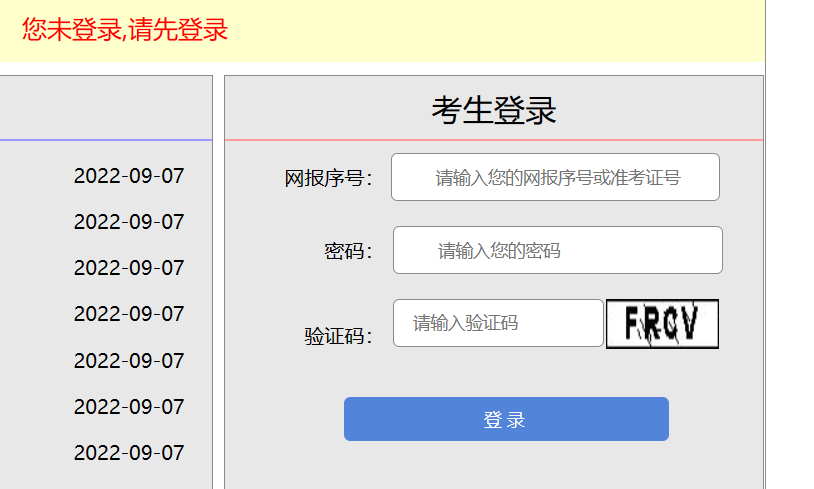
 山西省成人高考成绩批量查询工具 目标站点:https://gkpt.sxkszx.cn/Ck-student-web/#一、步骤分析1.登录的时候有个验证码需要过2.成绩查询是html解析,正则匹配一下就取出来了二、工具及源码技术点:网络爬虫,dataGridView导出为excel适合初学者入门学习和二次开发github链接:https://github.com/lisongkun/shanxi-adult-education-batch-query-score引用1.SunnyUI Github:https://github.com/yhuse/SunnyUI2.C# Winform中DataGridView导出为Excel看这一篇就够了,详细!!!(完整快速版):https://blog.csdn.net/Houoy/article/details/1060278793.Fluent HTTP:https://flurl.dev/docs/fluent-http/
 -
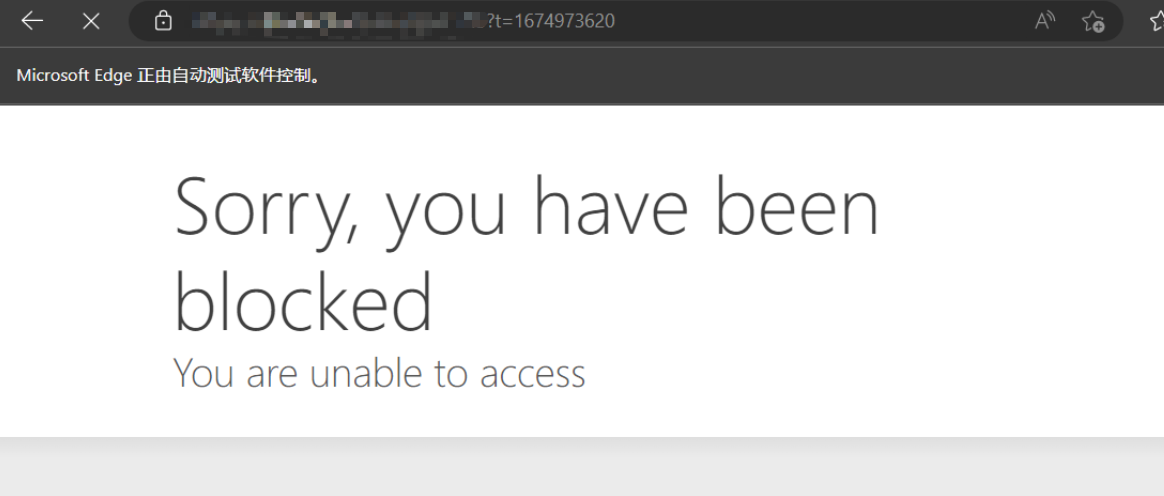
 selenium爬虫如何防止被浏览器特征抓取反爬 前言爬网站的时候遇到了cf拦截,根据百度到的尝试添加参数还是无法跳过service = Service('msedgedriver.exe') options = Options() # 开启开发者模式 options.add_experimental_option('excludeSwitches', ['enable-automation']) # 禁用Blink运行时功能 options.add_argument('--disable-blink-features=AutomationControlled') driver = webdriver.Edge(service=service)undetected-chromedriverOptimized Selenium Chromedriver patch which does not trigger anti-bot services like Distill Network / Imperva / DataDome / Botprotect.io Automatically downloads the driver binary and patches it.Tested until current chrome beta versionsWorks also on Brave Browser and many other Chromium based browsers, some tweakingPython 3.6++**我主要使用的Edge,介绍说会自动下载Chrome,并没有体验到,于是自己安装了Chrome浏览器代码跟之前selenium的相差不大,成功解决了问题,再没出现过Cf拦截from pyquery import PyQuery as pq import re import time from undetected_chromedriver import ChromeOptions import undetected_chromedriver as uc options = ChromeOptions() options.add_argument('--headless') options.add_argument('--disable-gpu') driver = uc.Chrome(options=options) driver.get('http://...') html_source = driver.page_source doc = pq(html_source) titles = doc.find('tag')引用1.ultrafunkamsterdam/undetected-chromedriver:https://github.com/ultrafunkamsterdam/undetected-chromedriver2.Chrome Headless Detection (Round II):https://intoli.com/blog/not-possible-to-block-chrome-headless/chrome-headless-test.html3.selenium爬虫如何防止被浏览器特征抓取反爬,undetected_chromedriver他来了。:https://blog.csdn.net/wywinstonwy/article/details/118479162
 -
 通过Fiddler抓包调试PHP内Guzzle网络请求 场景最近在做设计素材网解析下载,后台框架使用Laravel网络请求框架使用HTTP ClientLaravel provides an expressive, minimal API around the Guzzle HTTP client, allowing you to quickly make outgoing HTTP requests to communicate with other web applications. Laravel's wrapper around Guzzle is focused on its most common use cases and a wonderful developer experience.一、Fiddler配置HTTP 抓包Fiddler 主菜单 -> Tools -> Fiddler Options-> Connections-> 选中 Allowremote computers to connect装有 fiddler 的机器,找出能远程访问的 IP,一般局域网内也就是本机 IP。被抓包调试的设备在网络代理那里启用代理 -> 代理 IP 就是上面说的 IP-> 端口号默认为 8888 (可以在 fiddler 中 Connections 标签页修改)这样就 OK 了。HTTPS 抓包Fiddler 主菜单 -> Tool->Fiddler Options->HTTPS -> 选中 decrypt https traffic 和 ignore server certificate errors会提示你安装证书,必要要安装。然后同 HTTP 抓包一样操作二、代码配置代理$response = Http::withCookies(cookieStrToArray($cookie->content), 'nipic.cn') ->withOptions( [ 'proxy' => '127.0.0.1:8888', // 端口为Fiddler中配置的端口 'verify' => false, // 禁用证书验证 ]) ->withHeaders([ 'Accept' => 'text/html,application/xhtml+xml,application/xml;q=0.9,image/avif,image/webp,image/apng,*/*;q=0.8,application/signed-exchange;v=b3;q=0.9', 'Accept-Encoding' => 'gzip, deflate, br', ]) ->withUserAgent('Mozilla/5.0 (Windows NT 10.0; Win64; x64) AppleWebKit/537.36 (KHTML, like Gecko) Chrome/105.0.0.0 Safari/537.36') ->get("https://down.nipic.cn/download?id=$resourceId")->body();再次请求可以看到Fiddler拦截到了请求。三、使用Telescope需要安装一下对应的依赖# You may use the Composer package manager to install Telescope into your Laravel project: composer require laravel/telescope --dev # After installing Telescope, publish its assets using the telescope:install Artisan command. After installing Telescope, you should also run the migrate command in order to create the tables needed to store Telescope's data: php artisan telescope:install php artisan migrate只有使用HTTP Client才会被记录,而且请求和响应的记录信息不太全,所以使用Fiddler还是更好的选择。引用1.Fiddler 抓包调试 : https://www.chengxiaobai.cn/skills/fiddler-capture-debugging.html2.laravel中使用Guzzle 报 unable to get local issuer certificate错误信息:https://blog.csdn.net/worldmakewayfordream/article/details/1143020203.Guzzle 6 请求选项 :https://guzzle-cn.readthedocs.io/zh_CN/latest/request-options.html4.如何获取php向其它网站发起了什么请求,有什么办法?: https://learnku.com/laravel/t/673455.HTTP Client : https://laravel.com/docs/9.x/http-client6.Laravel Telescope : https://laravel.com/docs/9.x/telescope
 -
![Java实现网络爬虫[1+x大数据应用的实战]](https://unpkg.com/typecho-joe-next@6.0.0/assets/img/lazyload.jpg) Java实现网络爬虫[1+x大数据应用的实战] 前言这几天打算考一个`1+X 大数据应用中级证书`,这个是蓝桥的,我和蓝桥挺有缘的。高中就听过蓝桥杯,大一也如愿参加了现在又是蓝桥的这个证书。 做了一下官方的模拟考试,发现考的并不是特别难,但是相应的技术都已经学过了,所以想利用这些知识来实战一下。 技术点有:网络请求、mysql存储数据、JSON数据解析 爬取目标:蓝桥杯大赛的所有大赛通知32页数据 ,将每条的标题\内容\发布日期\存储到数据库中通过浏览器的开发者工具抓了下包,配合Postman调试了一下得到以下的信息:{card-default label="REQUEST" width=""}PATH : https://dasai.lanqiao.cn/api/action/http/getMETHOD:POSTBODY:参数名示例urlhttp://10.251.196.135/API.php?m=list&id=20&p=1&s=10其中 p 代表页码,s 代表每一页的数据条数。{/card-default}理论上可以一个请求获取到所有的数据,在明确数据总条数的情况但是本篇讲解是基于不断改变页码的方式来操作的,有兴趣可以自主尝试一下前者二、编码MAVEN配置<dependencies> <!-- 网络请求 所需要的包 --> <dependency> <groupId>org.apache.httpcomponents</groupId> <artifactId>httpclient</artifactId> <version>4.5.6</version> </dependency> <!-- 引入fastjson 解析json数据--> <dependency> <groupId>com.alibaba</groupId> <artifactId>fastjson</artifactId> <version>1.2.47</version> </dependency> <!-- 含有转义与去除转义的功能 --> <dependency> <groupId>org.apache.commons</groupId> <artifactId>commons-text</artifactId> <version>1.1</version> </dependency> <!-- MySql 8.0.18 Connector --> <dependency> <groupId>mysql</groupId> <artifactId>mysql-connector-java</artifactId> <version>8.0.18</version> </dependency> </dependencies>代码import org.apache.http.client.methods.CloseableHttpResponse; import org.apache.http.client.methods.HttpPost; import org.apache.http.impl.client.CloseableHttpClient; import org.apache.http.impl.client.HttpClients; import java.io.IOException; /** * @author hygge * @description * @create 2020/12/25 20:10 */ public class main { public static void main(String[] args) { //初始化网络请求的对象 CloseableHttpClient client = HttpClients.createDefault(); //定义网络响应对象 CloseableHttpResponse response = null; //定义请求方式 HttpPost httpPost = new HttpPost("https://dasai.lanqiao.cn/api/action/http/get"); NameValuePair para = new BasicNameValuePair("url","http://10.251.196.135/API.php?m=list&id=20&p=1&s=10"); List<NameValuePair> list = new ArrayList<NameValuePair>(); list.add(para); try { StringEntity stringEntity = new UrlEncodedFormEntity(list); httpPost.setEntity(stringEntity); //client.execute()会导致IOException 异常,所以要捕捉一下 //execute()需要一个实现HttpUriRequest接口的类作为参数,有HttpPost\HttpGet,详见该接口的源码 response = client.execute(httpPost); // 对响应的状态码进行判断。 if(response.getStatusLine().getStatusCode() == 200){ //获取响应的源代码 HttpEntity entity = response.getEntity(); String str = EntityUtils.toString(entity, "UTF-8"); System.out.println(str); } } catch (IOException e) { e.printStackTrace(); }finally{ // 防止响应为空 if(response != null){ try { response.close(); } catch (IOException e) { e.printStackTrace(); } } // 防止请求为空 if(client != null){ try { client.close(); } catch (IOException e) { e.printStackTrace(); } } } } }运行查看效果控制台中可以看到打印的响应下面要做两件事,去除响应的转义,也就是 \" 等字符去除开头和结尾的引号应字符串解析为JSON数据// StringEscapeUtils 来自于 依赖中的 commons-text str = StringEscapeUtils.unescapeJava(str); str = str.substring(1,str.length() - 1); //打印一下 发现去除转义、开头结尾的引号的效果已经达到。 //{"total":"315","new_list":[{"id":"1850","title":"……将响应格式化一下:发现响应本身是一个jsonObject,我们要的是 new_list 节点,它是一个jsonArray,照此思路我们来解析它。//将响应字符串 先 转为 JSONObject JSONObject allObj = JSON.parseObject(str); //取出其中的new_list节点 作为JSONArray JSONArray new_list = allObj.getJSONArray("new_list"); //我们来遍历一下这个JSONArray JSONObject item = null; for(int i = 0;i < new_list.size();i++){ item = new_list.getJSONObject(i); System.out.println(item.getString("title")); System.out.println(item.getString("content")); System.out.println(item.getString("up_time")); }完成
Java实现网络爬虫[1+x大数据应用的实战] 前言这几天打算考一个`1+X 大数据应用中级证书`,这个是蓝桥的,我和蓝桥挺有缘的。高中就听过蓝桥杯,大一也如愿参加了现在又是蓝桥的这个证书。 做了一下官方的模拟考试,发现考的并不是特别难,但是相应的技术都已经学过了,所以想利用这些知识来实战一下。 技术点有:网络请求、mysql存储数据、JSON数据解析 爬取目标:蓝桥杯大赛的所有大赛通知32页数据 ,将每条的标题\内容\发布日期\存储到数据库中通过浏览器的开发者工具抓了下包,配合Postman调试了一下得到以下的信息:{card-default label="REQUEST" width=""}PATH : https://dasai.lanqiao.cn/api/action/http/getMETHOD:POSTBODY:参数名示例urlhttp://10.251.196.135/API.php?m=list&id=20&p=1&s=10其中 p 代表页码,s 代表每一页的数据条数。{/card-default}理论上可以一个请求获取到所有的数据,在明确数据总条数的情况但是本篇讲解是基于不断改变页码的方式来操作的,有兴趣可以自主尝试一下前者二、编码MAVEN配置<dependencies> <!-- 网络请求 所需要的包 --> <dependency> <groupId>org.apache.httpcomponents</groupId> <artifactId>httpclient</artifactId> <version>4.5.6</version> </dependency> <!-- 引入fastjson 解析json数据--> <dependency> <groupId>com.alibaba</groupId> <artifactId>fastjson</artifactId> <version>1.2.47</version> </dependency> <!-- 含有转义与去除转义的功能 --> <dependency> <groupId>org.apache.commons</groupId> <artifactId>commons-text</artifactId> <version>1.1</version> </dependency> <!-- MySql 8.0.18 Connector --> <dependency> <groupId>mysql</groupId> <artifactId>mysql-connector-java</artifactId> <version>8.0.18</version> </dependency> </dependencies>代码import org.apache.http.client.methods.CloseableHttpResponse; import org.apache.http.client.methods.HttpPost; import org.apache.http.impl.client.CloseableHttpClient; import org.apache.http.impl.client.HttpClients; import java.io.IOException; /** * @author hygge * @description * @create 2020/12/25 20:10 */ public class main { public static void main(String[] args) { //初始化网络请求的对象 CloseableHttpClient client = HttpClients.createDefault(); //定义网络响应对象 CloseableHttpResponse response = null; //定义请求方式 HttpPost httpPost = new HttpPost("https://dasai.lanqiao.cn/api/action/http/get"); NameValuePair para = new BasicNameValuePair("url","http://10.251.196.135/API.php?m=list&id=20&p=1&s=10"); List<NameValuePair> list = new ArrayList<NameValuePair>(); list.add(para); try { StringEntity stringEntity = new UrlEncodedFormEntity(list); httpPost.setEntity(stringEntity); //client.execute()会导致IOException 异常,所以要捕捉一下 //execute()需要一个实现HttpUriRequest接口的类作为参数,有HttpPost\HttpGet,详见该接口的源码 response = client.execute(httpPost); // 对响应的状态码进行判断。 if(response.getStatusLine().getStatusCode() == 200){ //获取响应的源代码 HttpEntity entity = response.getEntity(); String str = EntityUtils.toString(entity, "UTF-8"); System.out.println(str); } } catch (IOException e) { e.printStackTrace(); }finally{ // 防止响应为空 if(response != null){ try { response.close(); } catch (IOException e) { e.printStackTrace(); } } // 防止请求为空 if(client != null){ try { client.close(); } catch (IOException e) { e.printStackTrace(); } } } } }运行查看效果控制台中可以看到打印的响应下面要做两件事,去除响应的转义,也就是 \" 等字符去除开头和结尾的引号应字符串解析为JSON数据// StringEscapeUtils 来自于 依赖中的 commons-text str = StringEscapeUtils.unescapeJava(str); str = str.substring(1,str.length() - 1); //打印一下 发现去除转义、开头结尾的引号的效果已经达到。 //{"total":"315","new_list":[{"id":"1850","title":"……将响应格式化一下:发现响应本身是一个jsonObject,我们要的是 new_list 节点,它是一个jsonArray,照此思路我们来解析它。//将响应字符串 先 转为 JSONObject JSONObject allObj = JSON.parseObject(str); //取出其中的new_list节点 作为JSONArray JSONArray new_list = allObj.getJSONArray("new_list"); //我们来遍历一下这个JSONArray JSONObject item = null; for(int i = 0;i < new_list.size();i++){ item = new_list.getJSONObject(i); System.out.println(item.getString("title")); System.out.println(item.getString("content")); System.out.println(item.getString("up_time")); }完成


![Java实现网络爬虫[1+x大数据应用的实战]](https://www.lisok.cn/usr/uploads/2022/09/2176315505.png)